TeamViewer
You can provide more control over enterprise user accounts as well as improve user experience by allowing them to log in using NoPass™ passwordless authentication.
Before you begin
Make sure that you have the following components:
- NoPass™ server with Keycloak integrated via NoPass™ Extension.
- To implement this integration, you will need preconfigured Keycloak with SAML 2.0.
- For Keycloak configuration instructions, see Configure service providers with Keycloak.
- TeamViewer Enterprise/Tensor license.
- Administration login to Keycloak and TeamViewer management console.
- Access to DNS records for a chosen domain.
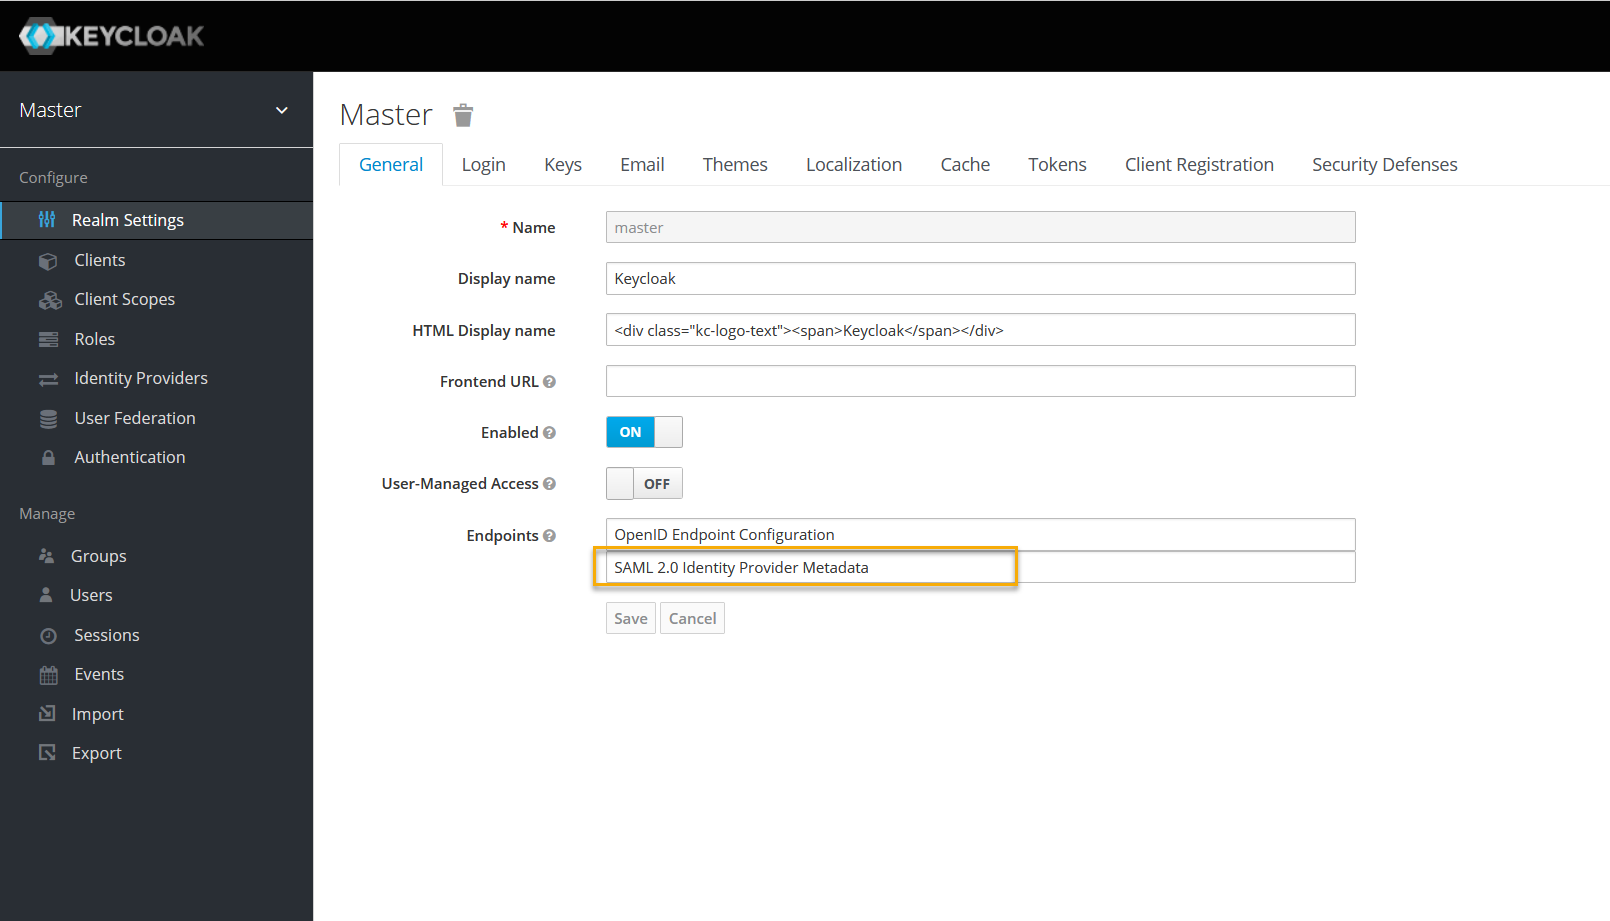
STEP 1. COPY THE IDP METADATA FROM KEYCLOAK
1. Log in to your Identité® Keycloak.
2. In Realm Settings, on the General tab, select SAML 2.0 Identity Provider Metadata to download the SAML Metadata.
Your URL should look similar to the following:
https://<keycloaklocation>/auth/realms/<realm>/protocol/saml/descriptor
step 2. configure saml for sso
1. In the TeamViewer Management Console, select the Single Sign-On menu.
2. Click Add domain and enter the domain you want to activate SSO for.
3. In the Metadata URL field, provide the Keycloak metadata - manually enter or paste the URL copied before.

4. Create a custom identifier and verify domain ownership. For the procedure, see the TeamViewer documentation.
STEP 3. CONFIGURE A NEW CLIENT IN KEYCLOAK
To establish communication between Keycloak and TeamViewer, do the following:
1. Download the TeamViewer metadata at the following link: https://sso.teamviewer.com/saml/metadata
2. In the Keycloak administration console, add a new client.

3. On the Add client tab, import the metadata file.

- On the Client Settings tab, in the Base URL field, enter the URL in the following format:
https://login.teamviewer.com/LogOn
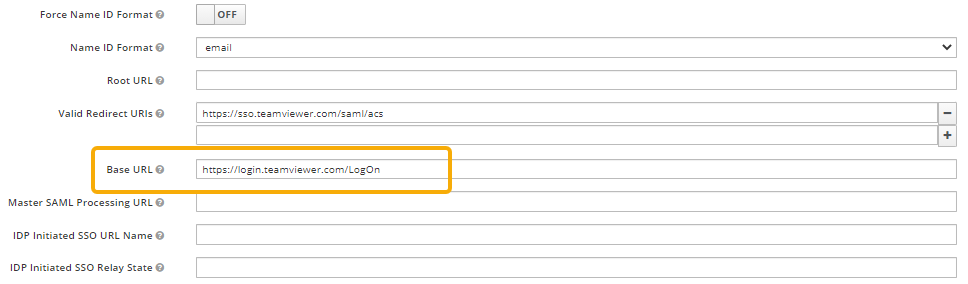
5 On the Settings tab, set the parameters as shown on the image below:

STEP 4. CREATE AND CONFIGURE MAPPERS
On the Mappers tab, create mappers for the following fields: customeridentifier, emailaddress.
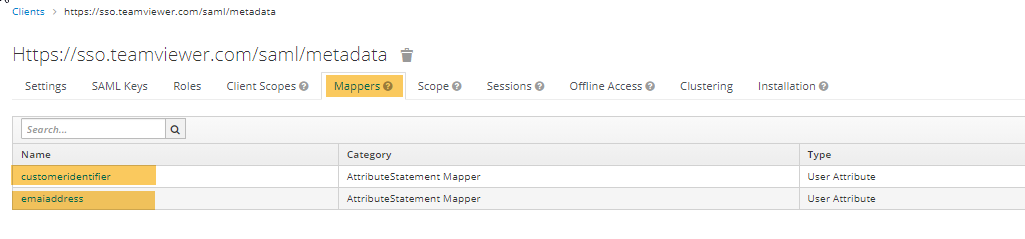
Emailaddress:
- In the Name field enter emailaddress or any other name to be displayed in Keycloak.
- From the Mapper Type, select User Attribute.
- In the User Attribute field, enter your email.
- In the Friendly Name field, enter emailaddress.
- In the SAML Attribute Name field, enter the URL in the following format:
http://schemas.xmlsoap.org/ws/2005/05/identity/claims/emailaddress

Customeridentifier:
- In the Name field enter customeridentifier.
- From the Mapper Type field, select User Attribute.
- In the User Attribute field, enter your email or a unique user ID.
- In the Friendly Name field, enter customeridentifier.
- In the SAML Attribute Name, enter the following URL: http://sso.teamviewer.com/saml/claims/customeridentifier.

STEP 3. TEST CONNECTION
You can log in to TeamViewer via the desktop application or browser at the following link:
https://login.teamviewer.com/LogOn.
For the TeamViewer user synchronization procedure, see the TeamViewer documentation.
For the Keycloak user synchronization procedure, see the Keycloak documentation.
STEP 4. ENABLE nOpASS aUTHENTICATION FLOW FOR tEAMvIEWER CLIENTS
Navigate to the Clients menu in the Keycloak administration console and do the following:
- On your client Settings tab, scroll down to the bottom of the page and select the Authentication Flow Overrides.
-
From the drop down menu, select the NoPass flow, and then click Save.

Now users can log in to TeamViewer via NoPass™.
next topic: Overview: NoPass™ Employee MFA "RADIUS"
previous topic: Slack