preparation
Procedure
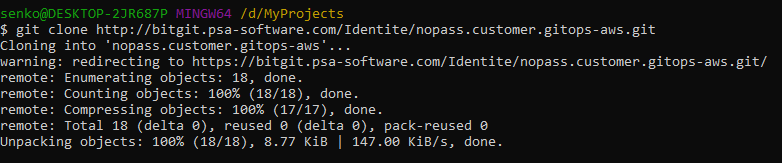
- Clone the repository with the terraform code. Credentials to authenticate:
Username: nopass.guest02
Password: Cvsg25xE@r$ git clone http://bitgit.psa-software.com/Identite/nopass .customer.gitops-aws.git $ git checkout tags/v1.0.0 -b v1.0.0
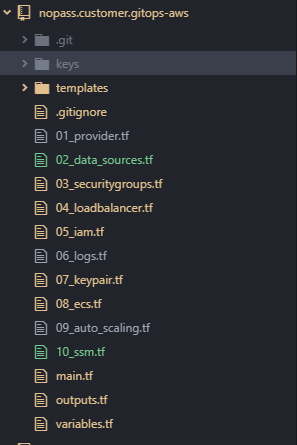
List of files in the repository:
- Copy the SSH key that you generated previously to the keys folder with the name aws_rsa.pub.

- Set environment variables for authentication in AWS. For more information about variables generating, see NoPass™ server environment variables. The access key and secret key should have been created earlier. Set the desired region. For example:
$ export AWS_ACCESS_KEY_ID=AKIAIOSFODNN7EXAMPLE
$ export AWS_SECRET_ACCESS_KEY=wJalrXUtnFEMI/K7MDENG/bPxRfiCYEXAMPLEKEY
$ export AWS_DEFAULT_REGION=us-east-1
- Open the variables.tf file for more detailed settings or skip this step.
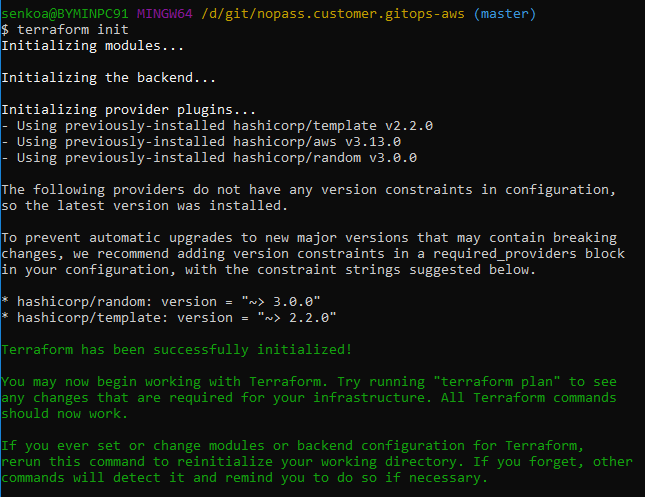
- Initialize the project.
$ terraform init
- Run the infrastructure building simulation. Enter the following values:
- AWS Certificate domain name.
- Docker image path.
- EC2 instanсe type. For the AWS EC2 type list, see Amazon EC2 Instance Types. We recommend using t3.small < 200 RPS.
- EC2 memory limit. Specify the required memory limit for the container. For example, t3.small has 2GB memory, the limit on the container can be set up at 1536.
- AWS region. For the AWS regions list, see What is Amazon EC2.
If you get a successful result, then you can run with the key apply:
$ terraform plan
Approximate setting time: 10 min$ terraform apply
The result is as follows:

Please use these values for the following purposes: - alb_hostname: create a DNS CNAME record to this load balancer URL.
- db_password: password to connect to the database.
- db_password_arn: password storage path in the AWS secrets.
- To destroy the infrastructure, run the following command:
$ terraform destroy –auto-approve