Install and activate the PasswordFree plugin
Overview
This guide describes how to integrate the PasswordFree plugin into your WordPress website so that you can provide your customers with a simple and secure means of PasswordFree Authentication and registration. To integrate the PasswordFree plugin into your website, you are either to have a WordPress website created or to create a new WordPress website.
Installation and first activation
You can install the PasswordFree plugin from the WordPress Admin panel either automatically or manually.
Automatic Installation
Procedure
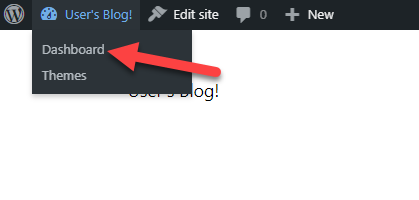
1. On your WordPress website homepage, navigate to Dashboard.
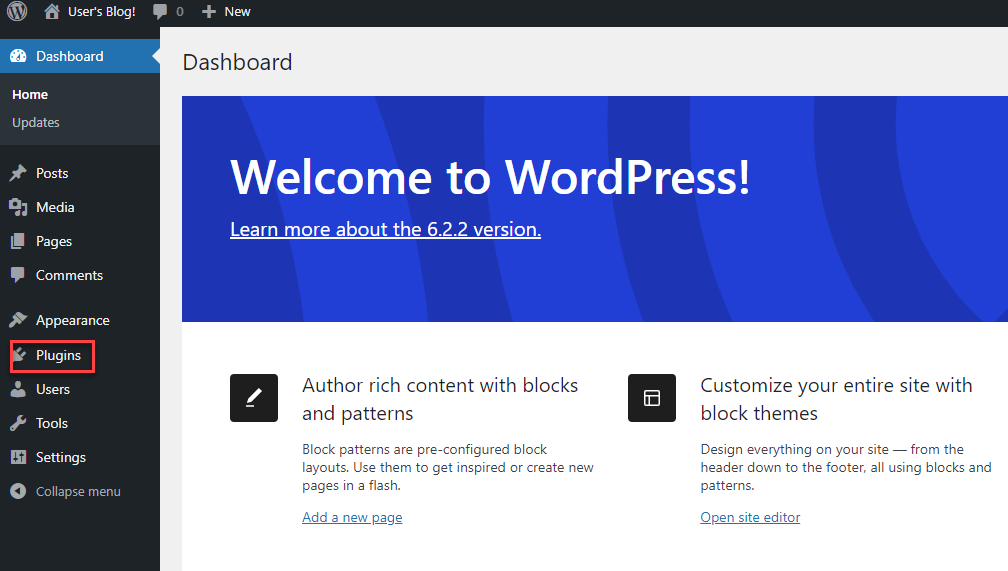
2. From your WordPress Admin panel, select Plugins.
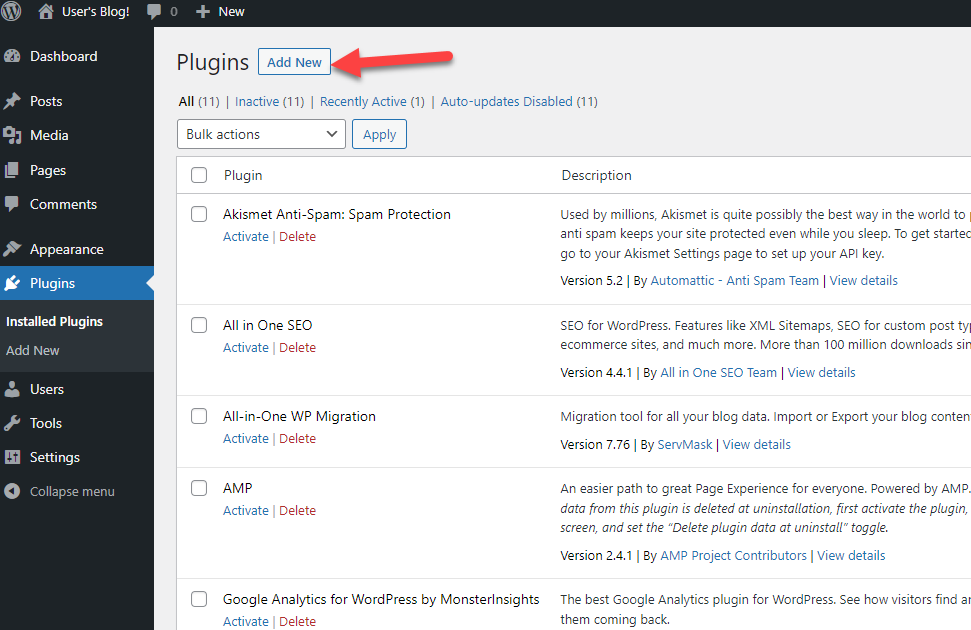
3. On the Plugins page, click Add new.
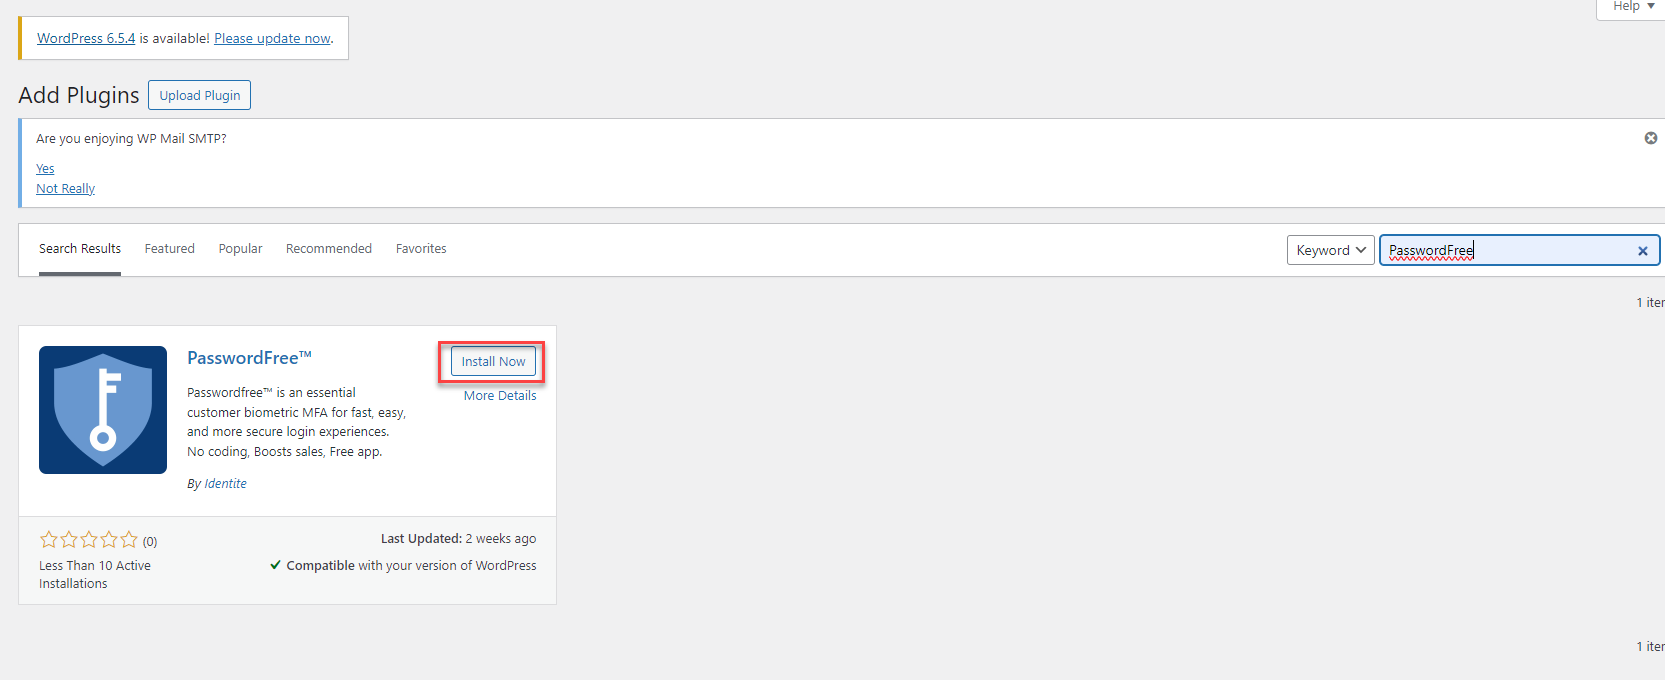
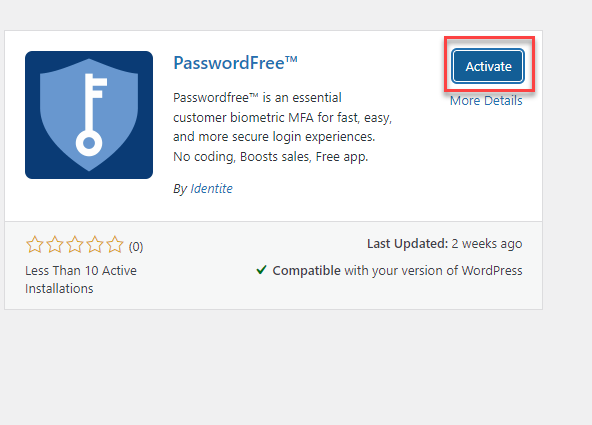
4. To install the PasswordFree plugin automatically, search for the PasswordFree plugin in the plugin directory or use the Search plugins... box. Then, click Install now.
5. After the PasswordFree plugin is installed, click Activate.
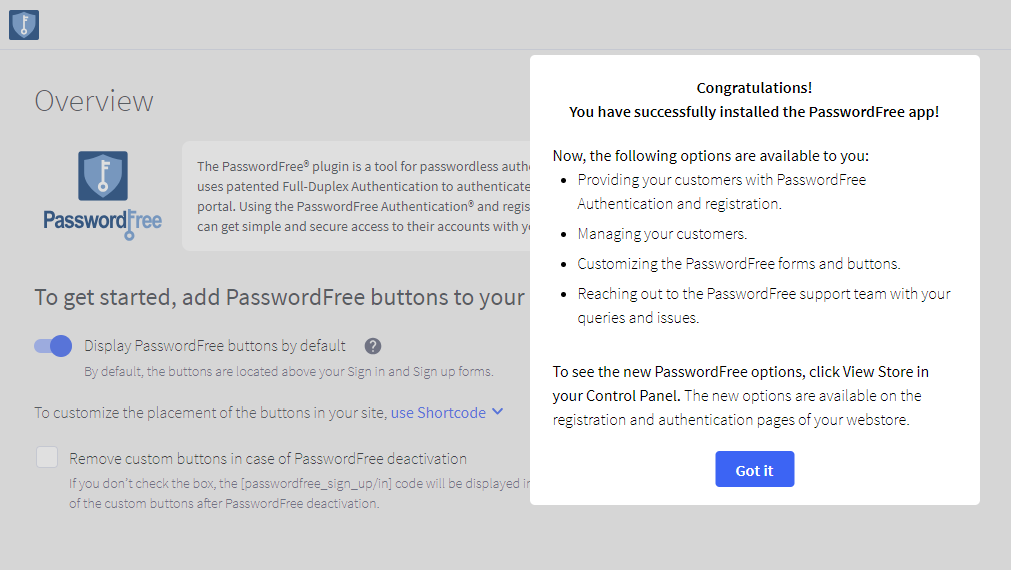
6. You are redirected to the Overview page with the Congratulations! notification. To close the Congratulations! notification, click Got it.
7. In case of installation error, the Installation error notification is displayed.
Manual installation and first activation
Before installing the PasswordFree plugin, download on your PC the installation .zip file. The PasswordFree plugin installation .zip file is available in the WordPress plugin directory.
Procedure
1. To manually install the PasswordFree plugin, click Add new on the Plugins page.
2. In the WordPress plugin repository, click WordPress Plugin Directory.

3. Use the Search plugins box to find the PasswordFree plugin installation file.

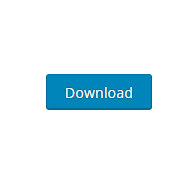
4. On the PasswordFree plugin page, click Download. Now, the PasswordFree plugin installation .zip file is stored on your PC.
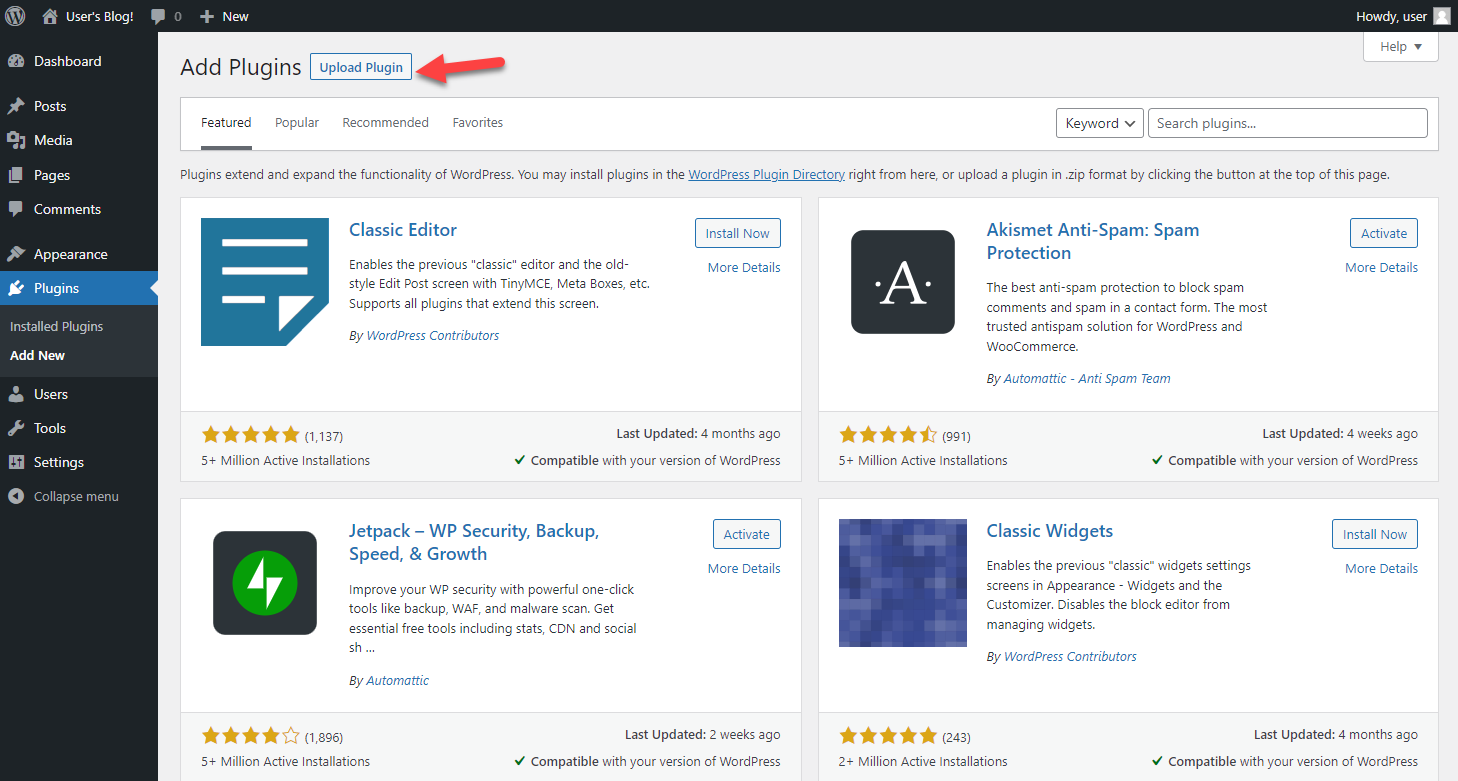
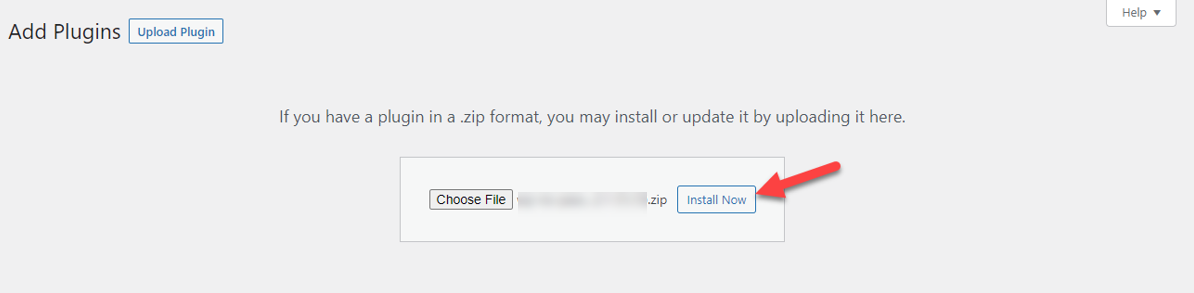
5. On the Add Plugins page, click Upload plugin.
6. In the following dialogue box, browse your files and select the installed PasswordFree plugin .zip file. Then, click Install Now.
7. After the plugin is installed, click Activate Plugin.
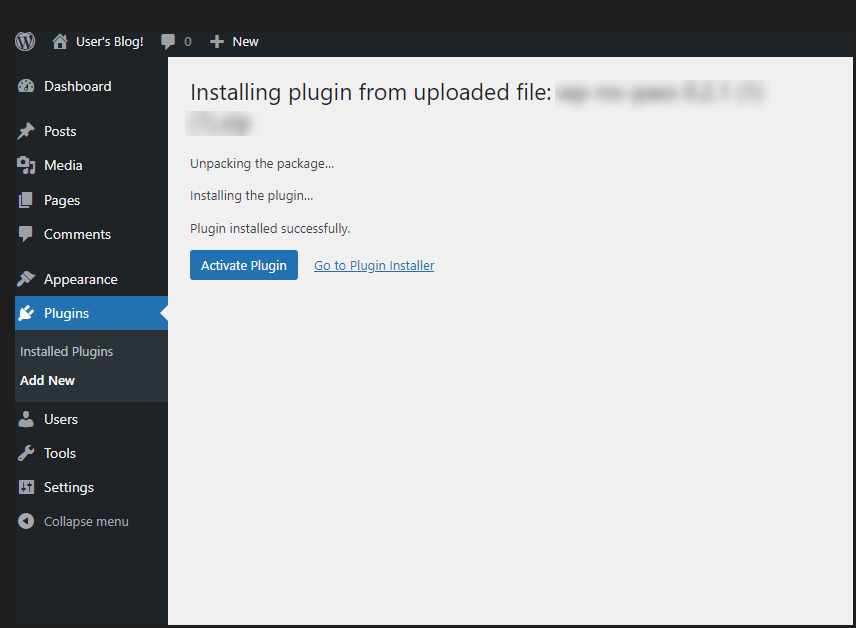
8. You are redirected to the Overview page with the Congratulations! notification. To close the Congratulations! notification, click Got it.
9. In case of installation error, the Installation error notification is displayed.
Results of plugin activation
After your PasswordFree plugin is installed and activated, the following events occur:
1. The PasswordFree plugin is displayed in your Admin panel.
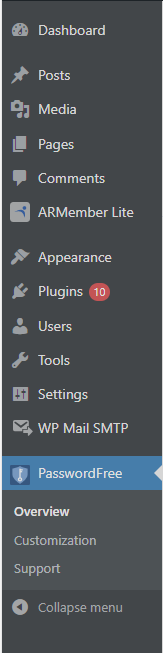
2. The following pages are available in your PasswordFree plugin:
- the Overview page
- the Customization page. To learn how to apply the customization options for the PasswordFree plugin on your WordPress website, see Customization of PasswordFree buttons.
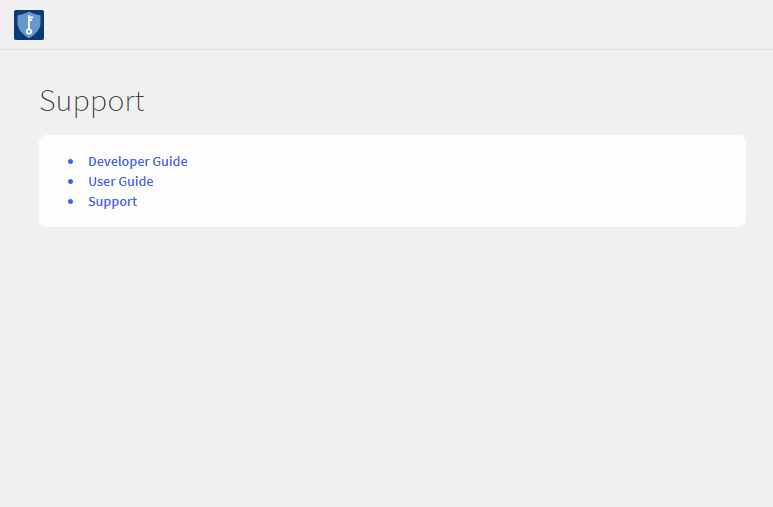
- the Support page containing links to the Developer Guide, User Guide, and Support page.
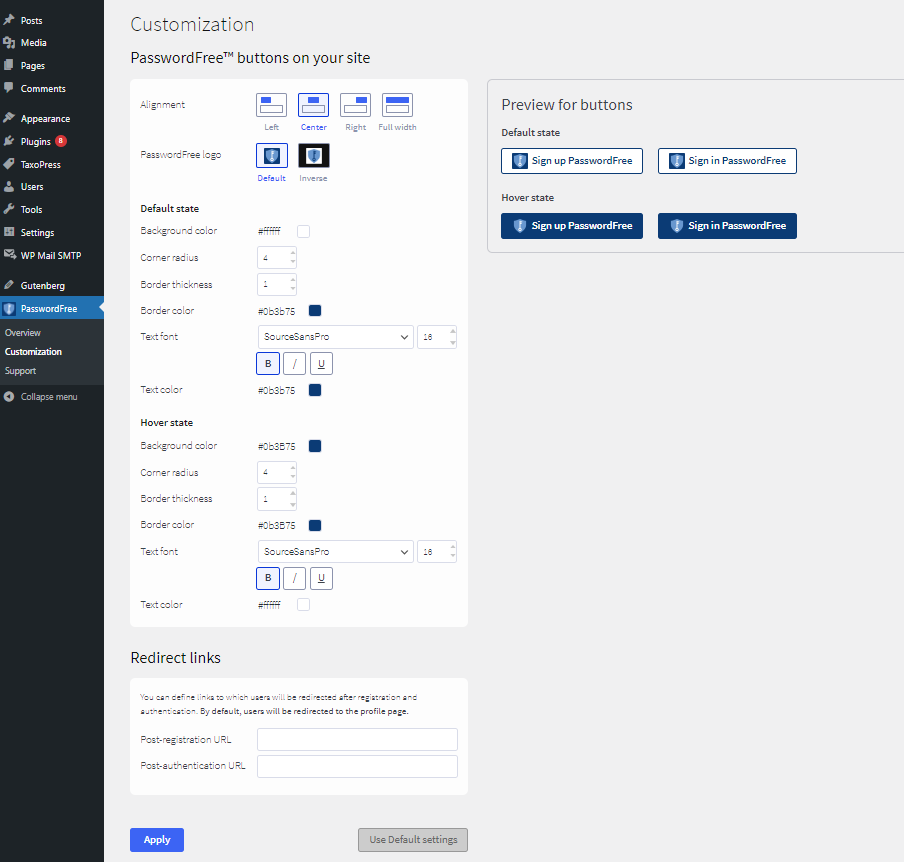
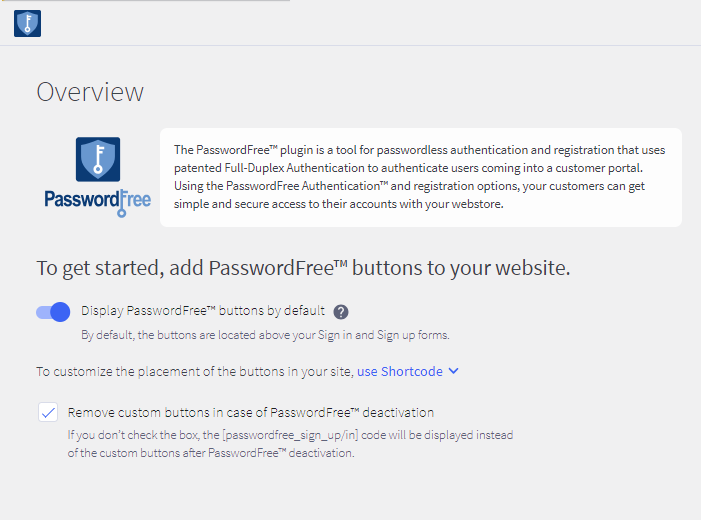
The Overview page
The Overview page contains the following options:
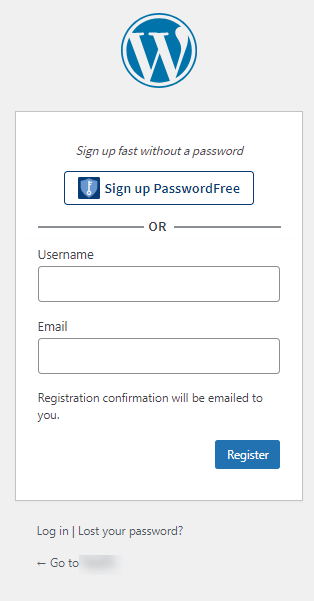
- The possibility to add the Sign up PasswordFree and Sign in PasswordFree buttons to your WordPress website.
1) To add the default Sign up PasswordFree and Sign in PasswordFree buttons, switch on the Display PasswordFree buttons by default toggle.
2) To learn how the default buttons are displayed, click  . The following hint message is displayed.

3) To add the customized Sign up PasswordFree and Sign in PasswordFree buttons, perform the following procedure.
Adding the buttons with shortcode
i) Click use Shortcode. The following options are displayed.
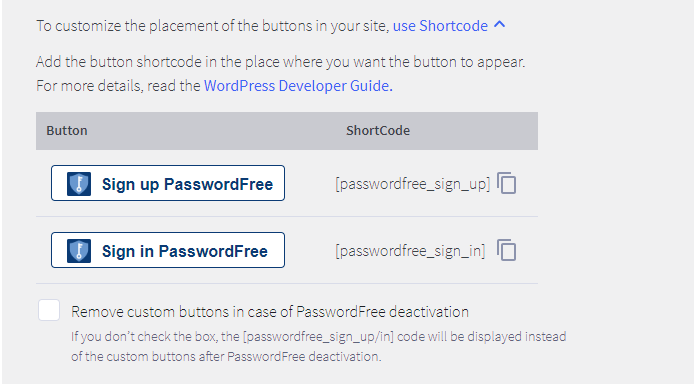
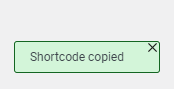
ii) To copy the shortcodes, click  next to the respective button shortcode. The following notification is displayed.
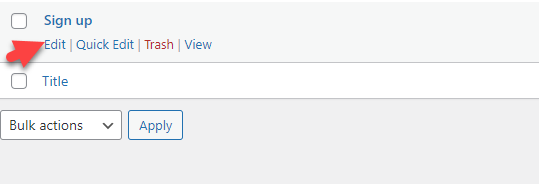
iii) In your Dashboard, navigate to Pages and select the page where you intend to locate the customized buttons.
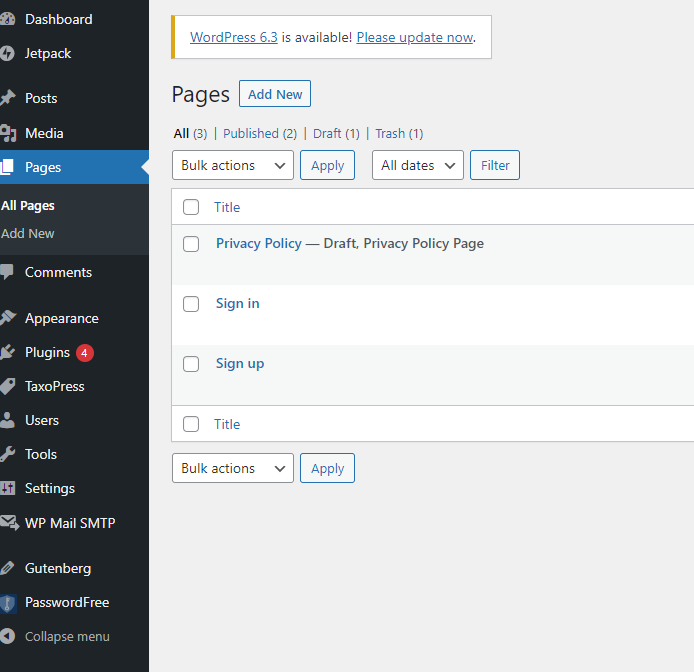
iv) When you hover over the selected page, the list of options is displayed. Click Edit.
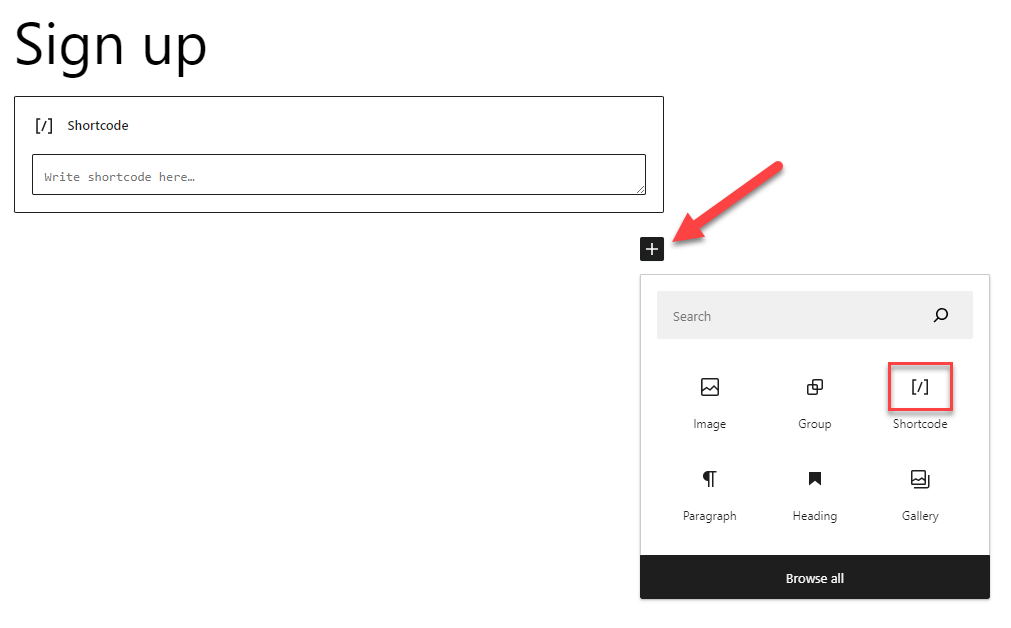
v) The selected page is opened in the editor mode. To add the customized button with shortcode, click the + sign and select Shortcode.
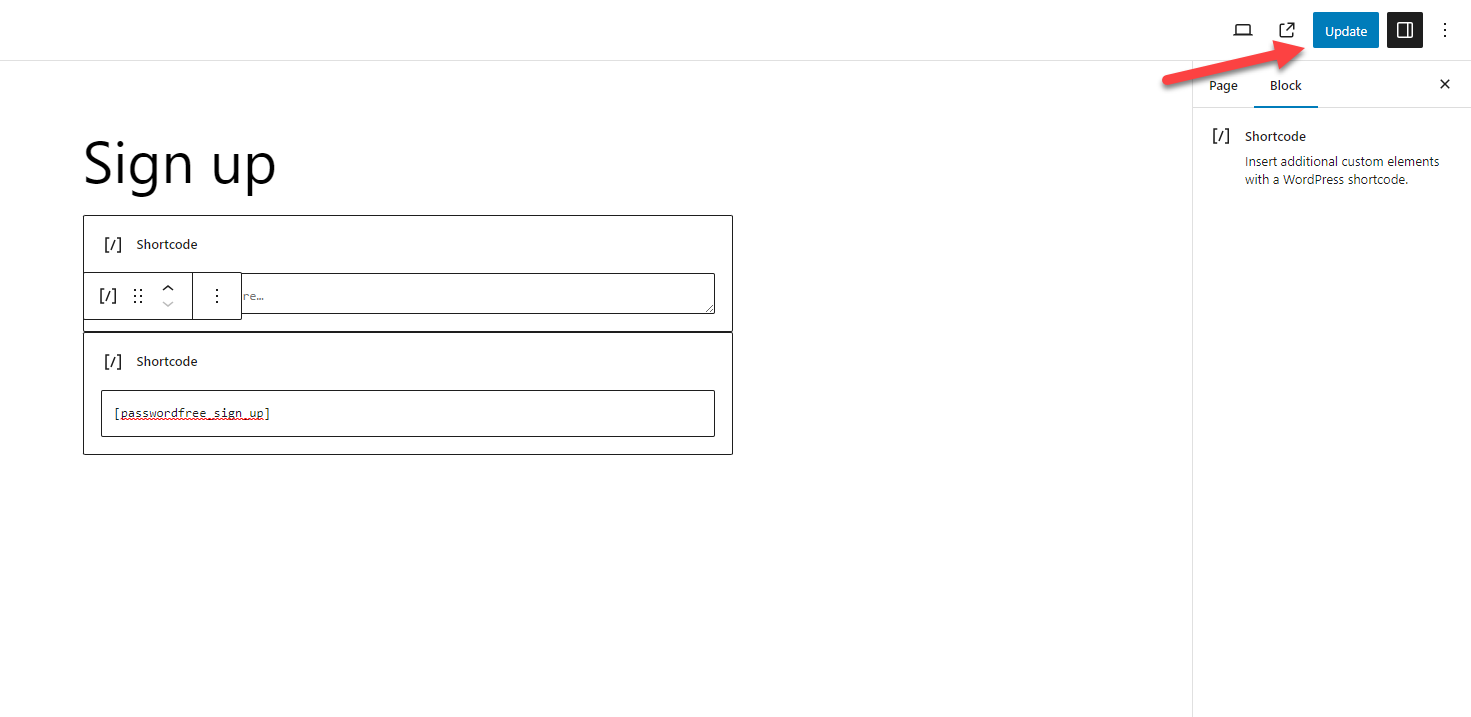
vi) Paste the copied shortcode in the shortcode box and click Update in the top right corner of the screen.
vii) To see your customized buttons added, log out from your Admin profile and go to the respective page of your WordPress website.
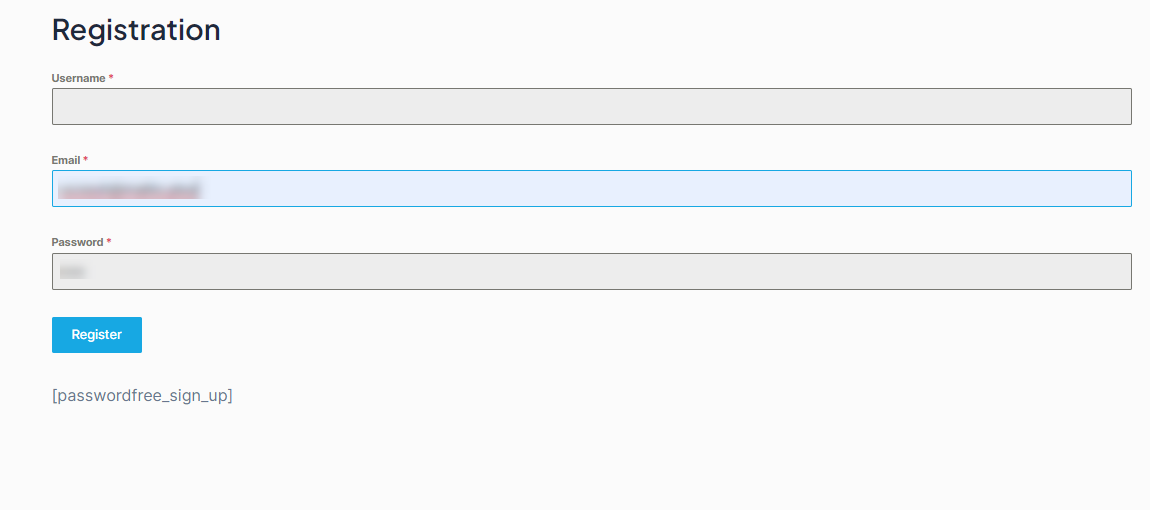
- The possibility to delete the customized buttons.
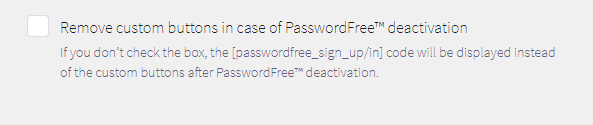
To remove the customized Sign up PasswordFree and Sign in PasswordFree buttons permanently after the plugin deactivation, select the checkbox.
Otherwise, your customized button is displayed as follows.
4. The default Sign up PasswordFree and Sign in PasswordFree buttons are available to you as an admin and to the users of your WordPress website.

5. In case the PasswordFree plugin is installed and activated but the default user registration is disabled on your WordPress site, the following notification is displayed.

6. Should it be the case, the following events occur:
- The Display PasswordFree buttons by default toggle is switched off and disabled.
- The default Sign up PasswordFree and Sign in PasswordFree buttons are hidden.
- The possibility to add customized Sign up PasswordFree and Sign in PasswordFree buttons with shortcode is available.
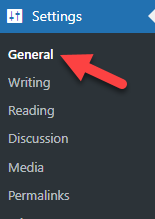
7. To enable the user registration on your WordPress website, navigate to Settings> General in your Admin panel.
8. Go to Membership and select the Anyone can register check box.
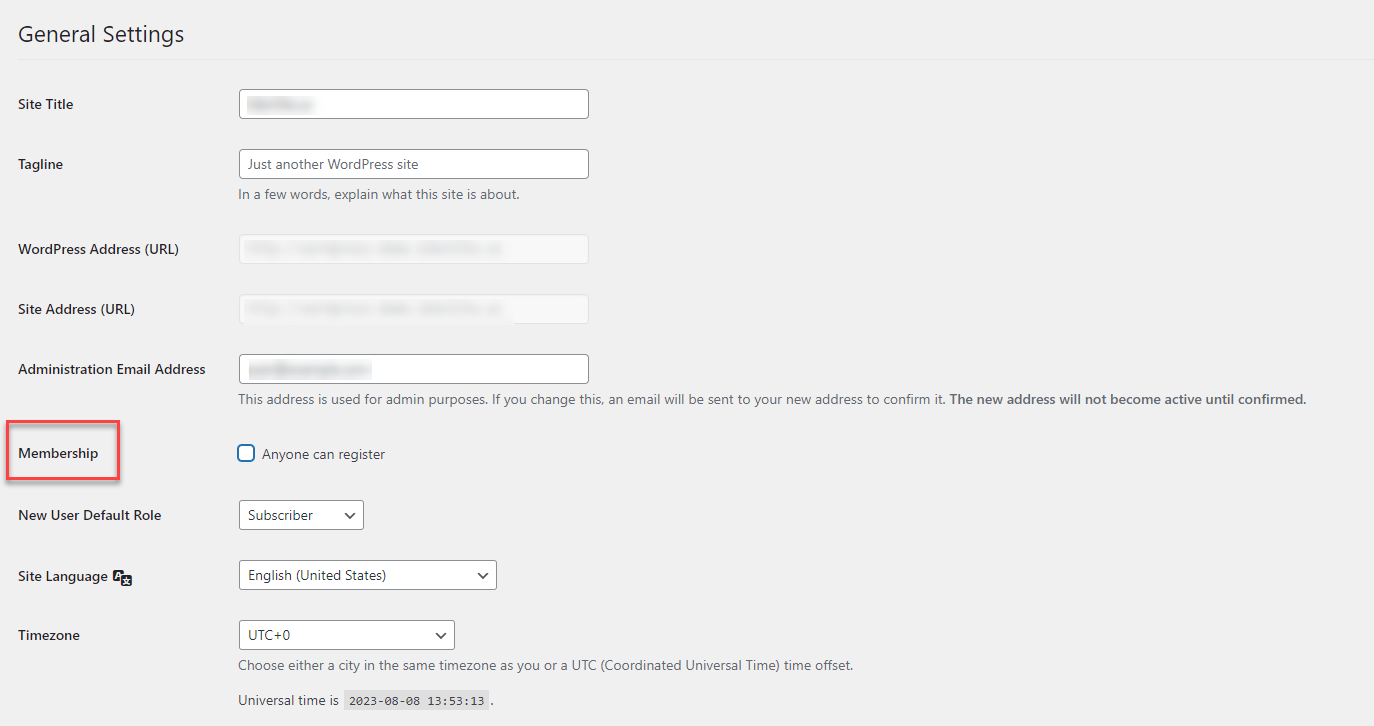
9. Then, click Save Changes at the bottom of the page.
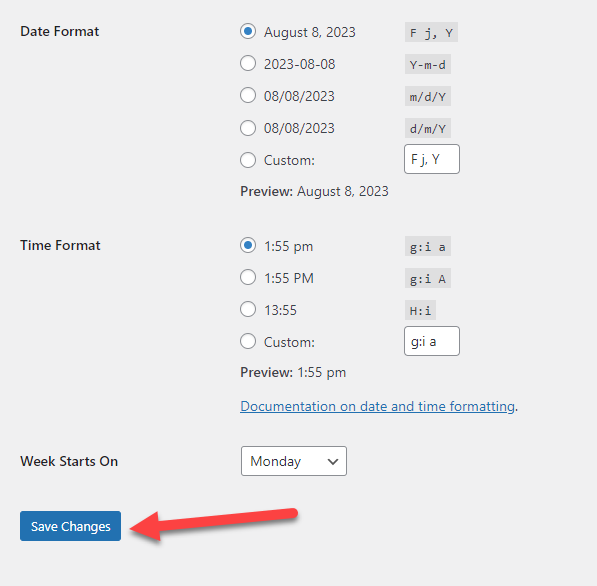
10. Now, your Overview page looks as follows.
Subsequent activation
You need to activate your PasswordFree plugin every time you deactivate it. After the plugin is deactivated, the PasswordFree buttons are removed from your registration / authentication pages, but the created accounts remain on users' devices. To enable the passwordless registration and authentication for your WordPress site users, you will need to re-activate the PasswordFree plugin.
Procedure
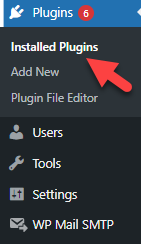
1. Navigate to your WordPress Admin panel. Click Plugins > Installed Plugins.
2. Select the PasswordFree plugin check box and click Activate.

3. Your PasswordFree plugin is active again.