Box
Secure your Box integration with NoPass™ passwordless authentication.
Before you begin
Set up single sing-on (SSO) in Box for your enterprise.
For the detailed guide, see the Setting Up Single Sign-On (SSO) for Your Enterprise page.
Procedure
STEP 1. CONFIGURE BOX
- Form a request to Box support using one of the following:
- On the same page, in the What Box needs from your identity provider table select Other/Custom IdPs, and follow the link:

- Go to Box support.
- On the same page, in the What Box needs from your identity provider table select Other/Custom IdPs, and follow the link:
- On the Box Support page, in the Who is your Identity Provider section, select Other with Metadata as shown below:

- Enter your organization’s Box Subdomain.

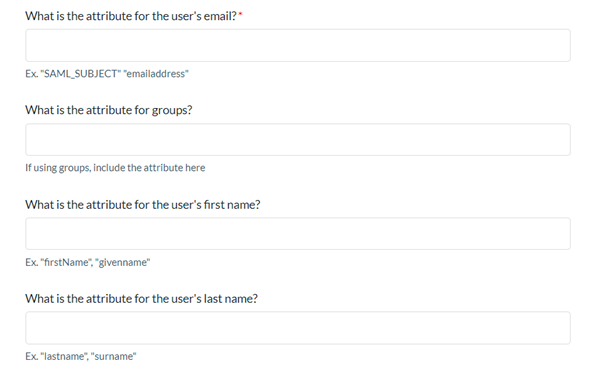
- Fill in the required attributes, make sure you make a note of the set attributes, we will later need them to map out these attributes in Identité® Keycloak.
STEP 2. COPY THE IDP METADATA FROM KEYCLOAK
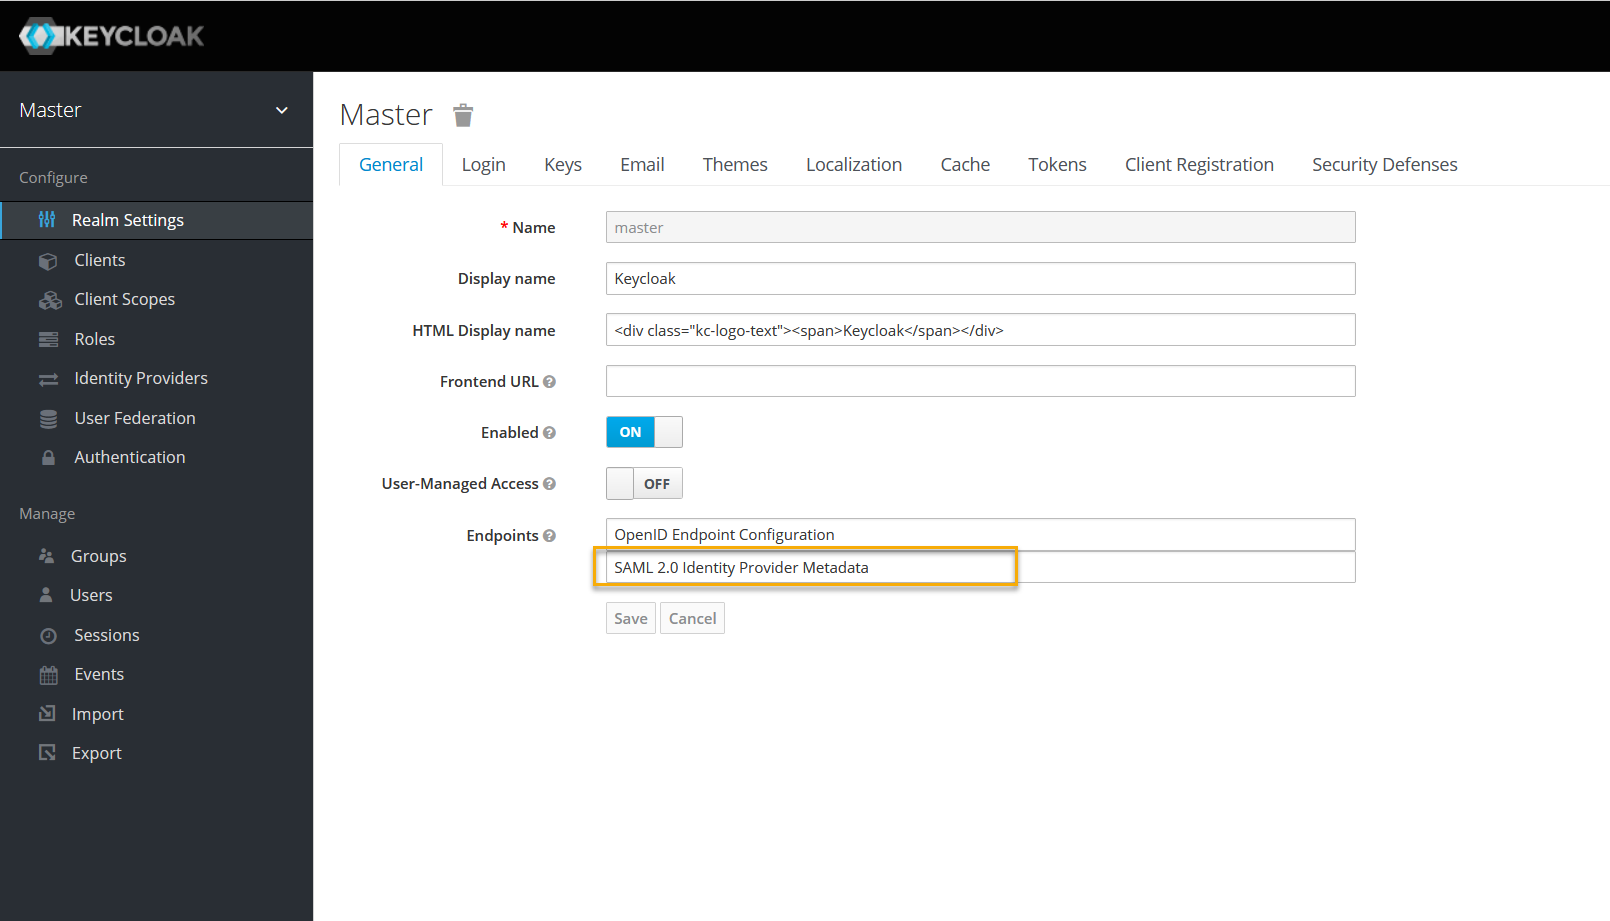
- Log in to your Identité® Keycloak to get your Identity Provider’s SAML metadata from Realm Settings.
- Upload this file into the Attachment section on the Box SSO Support Form, and then submit the form.

STEP 3. COPY THE CERTIFICATE
- In Box, on the Setting Up Single Sign-On (SSO) for Your Enterprise page, click the Box Metadata File and save it on your computer.

STEP 4. CREATE AND CONFIGURE A NEW CLIENT IN KEYCLOAK
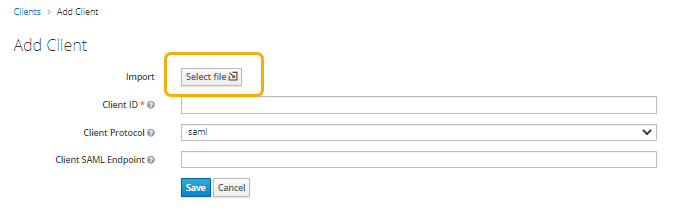
- Enter your Identité® Keycloak. On the Clients menu, create a new Client.

- On the Add Client tab, in Import, click Select file, and locate the Box Metadata File that you saved during step 7. This file can also be found here.
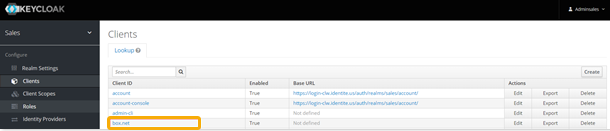
- Once added, you will be directed to the Box Client settings page or you can select it manually from your Clients section.
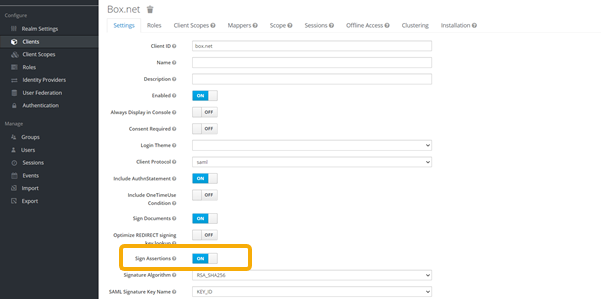
- In the Box Client section, scroll down, and switch on Sign Assertions.
- Scroll down and switch off Client Signature Required.

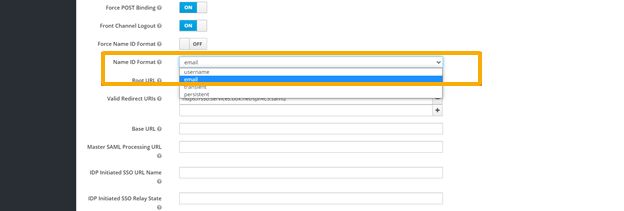
- In Name ID Format, select email, and then click Save.
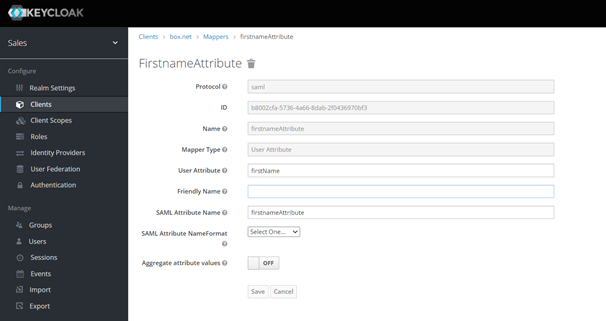
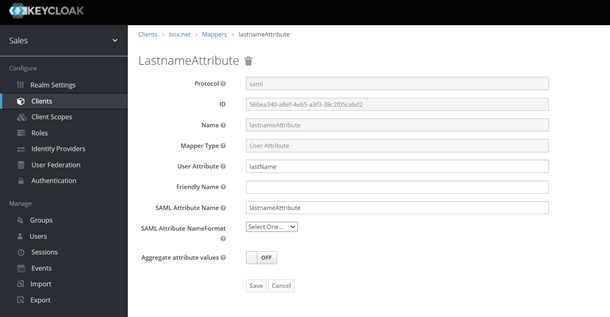
STEP 5. CREATE AND CONFIGURE MAPPERS
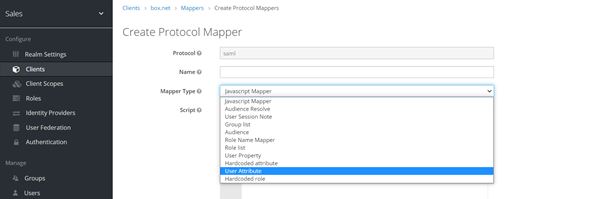
- In the Clients menu, on the Mappers tab, select Create.

- On Create Protocol Mapper, from Mapper Type, select User Attributes.
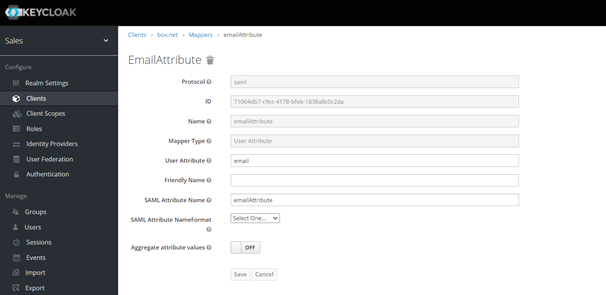
- Create user attributes that you had set in step 4. You need to create three separate attributes:
- First name
- Last name
Make sure, the attributes set in step 4 are identical to Name and SAML Attribute Name on the attribute creation page and then save these attributes.
STEP 6. TEST CONNECTION
- Go to your Box login page and test the SSO Login.

STEP 7. ENABLE NOPASS AUTHENTICATION FLOW
Navigate to the Clients menu in the Keycloak administration console and do the following:
- On your client Settings tab, scroll down to the bottom of the page and select the Authentication Flow Overrides.
-
From the drop down menu, select the NoPass flow, and then click Save.

Box SSO is now protected with NoPass™.
next topic: Confluence
previous topic: AD FS as a service provider