GitLab
The following instructions enable you to use NoPass™ 2FA for GitLab CE and EE versions. For this purpose, you will need a preconfigured Keycloak instance with SAML 2.0.
For Keycloak configuration instructions, see Configure service providers with Keycloak.
For detailed instructions on how to configure GitLab, see SAML OmniAuth Provider.
Procedure
STEP 1. COPY THE METADATA FROM KEYCLOAK
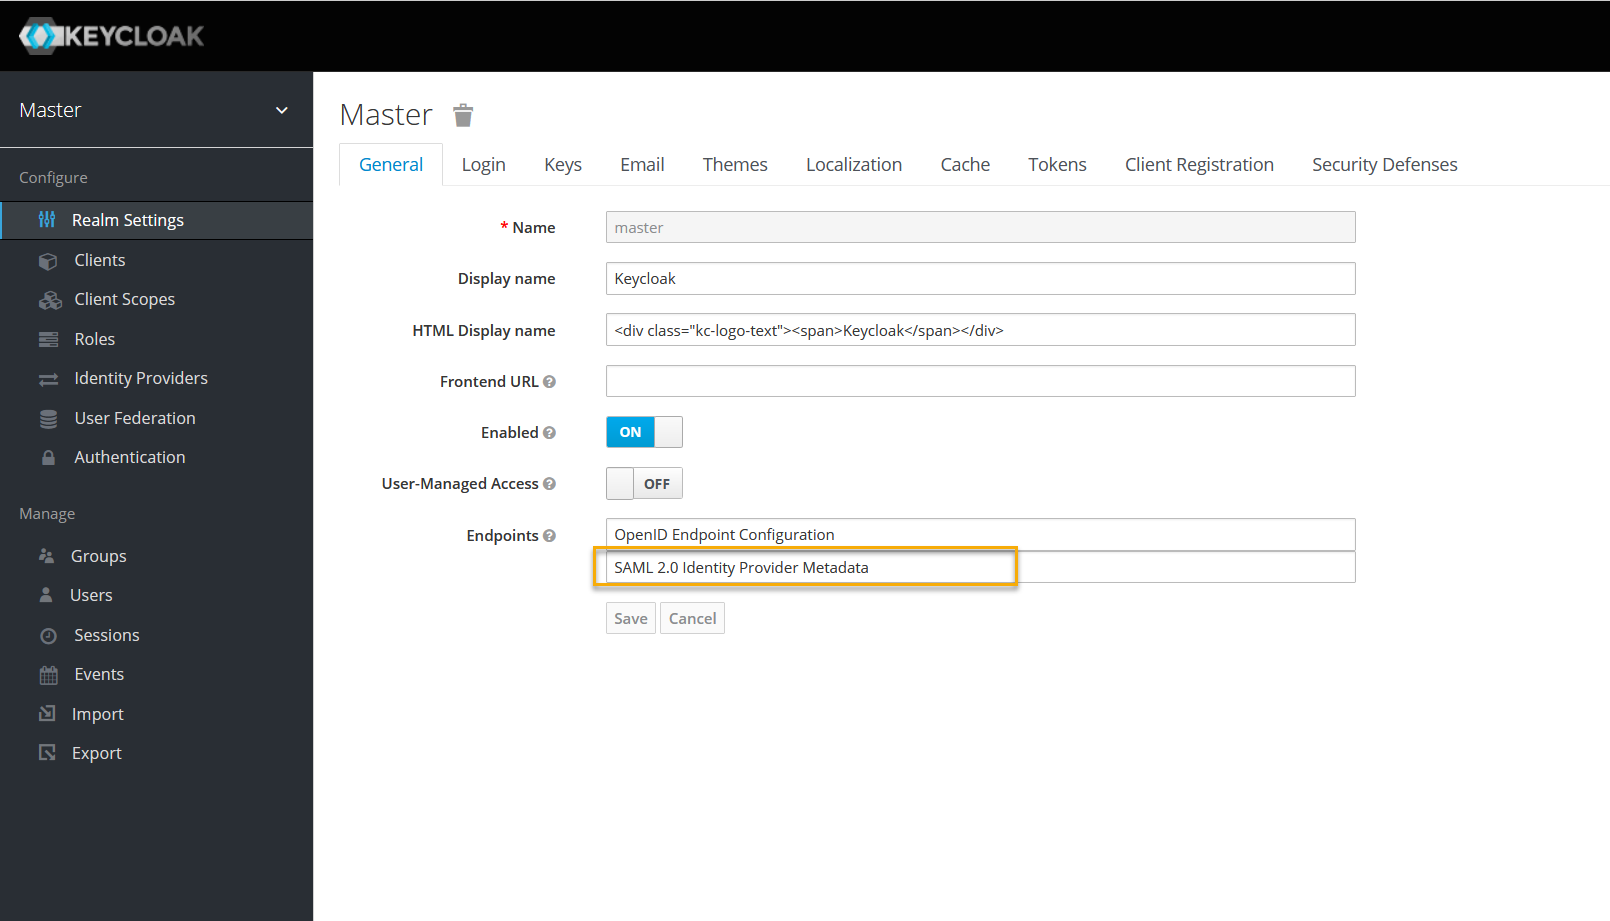
1. Log in to your Identité® Keycloak.
2. In Realm Settings, on the General tab, select SAML 2.0 Identity Provider Metadata to download the SAML Metadata.
Your URL should look similar to the following:
https://<keycloaklocation>/auth/realms/<realm>/protocol/saml/descriptor
STEP 2. Create and configure a new client in Keycloak
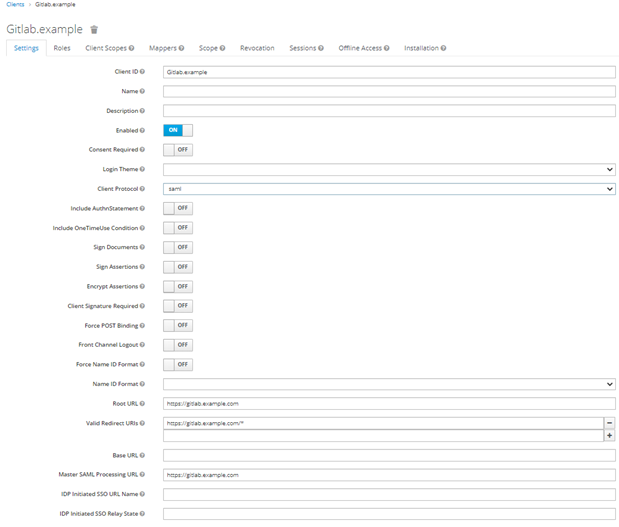
- In the Keycloak admin console, go to your realm → the Clients tab. Click Create.
The following instructions are shown for the realm called Stage. Your realm name can be different.

- On the Add client tab, do the following:
- Import the metadata file by inserting the URL: https://<gitlab.example.com>/users/auth/saml/metadata
- Fill in the client information fields, and then click Save.

- In the Clients menu, select the newly created client.
- On the Settings tab, set the following parameters:
- Enabled—ON
- Standard flow enabled—ON
- Direct Access Grants Enabled—ON
STEP 3. Configure roles
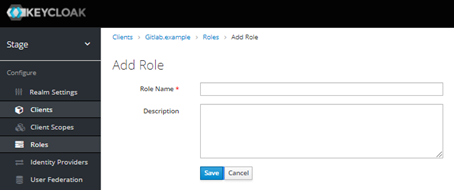
- On the Roles tab, click Add role to create a group named external for Gitlab.
- On the Add role page, fill in the following fields, and click Save:
- Role name: gitlab.example.com:external
- Description: gitlab.example.com:external

STEP 4. Create and configure mappers
Mappers allow matching fields from Keycloak to a service provider. For more information about SAML assertion mappings, see Keycloak Server Administration.
- On the Mappers tab, click Create to add mappers for GitLab in Keycloak.
- On the Create Protocol Mapper page, fill in the following fields for the mapper, and then click Save:
- Name
Name Enter name Mapper type Select User Property Property Enter username Friendly name Enter username or leave empty SAML Attribute Name Enter name SAML Attribute Name Format Select Basic
The successful result is as follows:
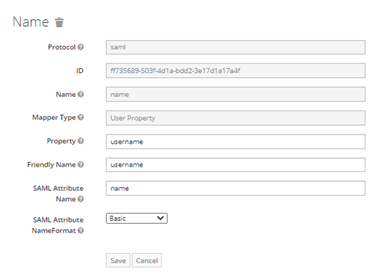
- Name
- Repeat steps 5 and 6 to create mappers for email, first_name, last_name, and roles. Populate the fields as suggested below:
- E-mail
Name Enter email Mapper type Select User Property Property Enter email Friendly name Enter email or leave empty SAML Attribute Name Enter email SAML Attribute Name Format Select Basic - First name
Name Enter first_name Mapper type Select User Property Property Enter FirstName Friendly name Enter First Name or leave empty SAML Attribute Name Enter First name SAML Attribute Name Format Select Basic - Last name
Name Enter Last_name Mapper type Select User Property Property Enter last name Friendly name Enter last name or leave empty SAML Attribute Name Enter last name SAML Attribute Name Format Select Basic - Roles
Name Enter roles Mapper type Select Role list Property Enter Role Friendly name Enter Roles or leave empty SAML Attribute Name Format Select Basic Single Role Attribute Switch to ON
The successful result is as follows:

- E-mail
STEP 5. Configure client scopes
- On the Scope tab, switch the Full Scope Allowed toggle on.

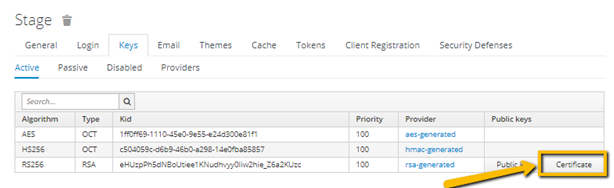
STEP 6. Copy the certificate
- In the Realm Settings menu, on the Keys tab, click Certificate to download the public certificate. You will need it at the next step.
STEP 7. Configure GitLab
- On your GitLab server, open the configuration file.
For Omnibus package:For installations from source:sudo editor /etc/gitlab/gitlab.rb
Cd /home/git/gitlab
Sudo -u git -H editor config/gitlab.yml
- Add the provider configuration and public certificate for your GitLab instance to use for SAML:
For example:omniauth: providers: - { name: 'saml', args: { assertion_consumer_service_url: 'https://gitlab.example.com/users/auth/saml/callback', idp_cert_fingerprint: '43:51:43:a1:b5:fc:8b:b7:0a:3a:a9:b1:0f:66:73:a8', idp_sso_target_url: 'https://login.example.com/idp', issuer: 'https://gitlab.example.com', name_identifier_format: 'urn:oasis:names:tc:SAML:2.0:nameid-format:persistent' }, label: 'Company Login' # optional label for SAML login button, defaults to "Saml" certificate: '-----BEGIN CERTIFICATE----------END CERTIFICATE-----', private_key: '-----BEGIN PRIVATE KEY----- -----END PRIVATE KEY-----', security: { authn_requests_signed: true, # enable signature on AuthNRequest want_assertions_signed: true, # enable the requirement of signed assertion embed_sign: true, # embedded signature or HTTP GET parameter signature metadata_signed: false, # enable signature on Metadata signature_method: 'http://www.w3.org/2001/04/xmldsig-more#rsa-sha256', digest_method: 'http://www.w3.org/2001/04/xmlenc#sha256', } } - Change the value for assertion_consumer_service_url to match the HTTPS endpoint of GitLab (append users/auth/saml/callback to the HTTPS URL of your GitLab installation to generate the correct value).
- Change the values of idp_cert_fingerprint, idp_sso_target_url, name_identifier_format to match your IdP.
- Change the value of the issuer to a unique name, which will identify the application to the IdP.
The name specified in issuer must be used when registering the GitLab SP in Keycloak
- For the changes to take effect, reconfigure or restart GitLab.
next topic: Jenkins
previous topic: Microsoft login (Office 365)