Microsoft Login (Office 365)
By default, Microsoft Login uses Azure AD as an identity provider. You will need to change it to the Keycloak+NoPass™ combination for custom domains.
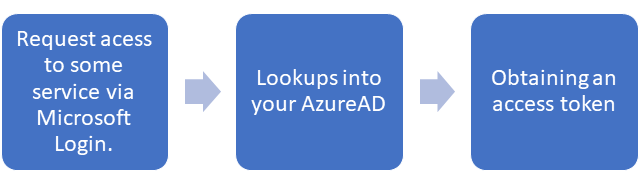
Usual steps:
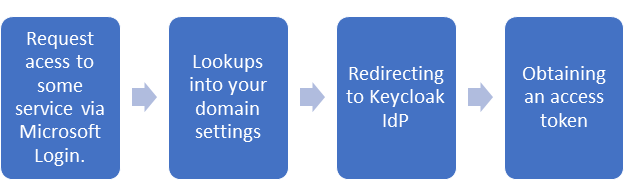
Keycloak+NoPass™ flow:
For the SSO integration scheme, see Getting started.
Before you begin
Make sure you have the following components:
- Installed Keycloak version 12+
- Deployed NoPass™ extension for Keycloak
- Office 365 admin rights
- The additional domain name (It is a Microsoft requirement. You need to keep one domain connected to an Azure IdP at least to avoid "unreachable" cases if something breaks on your side IdP.)
- On-Premis AD in your environment with admin rights.
For more information about using SAML 2.0 IdP for Single Sign-On, see Microsoft documentation.
Procedure
STEP 1. CHOOSE THE DOMAIN
Choose the domain to be connected to Keycloak. You can use an existing domain or add a new one.
For instructions on how to add a domain to Microsoft 365, see Microsoft documentation.
STEP 2. CONFIGURE A NEW CLIENT IN KEYCLOAK
1. Download Microsoft metadata and import the client data to Keycloak to establish a connection between Keycloak and Microsoft Login form.
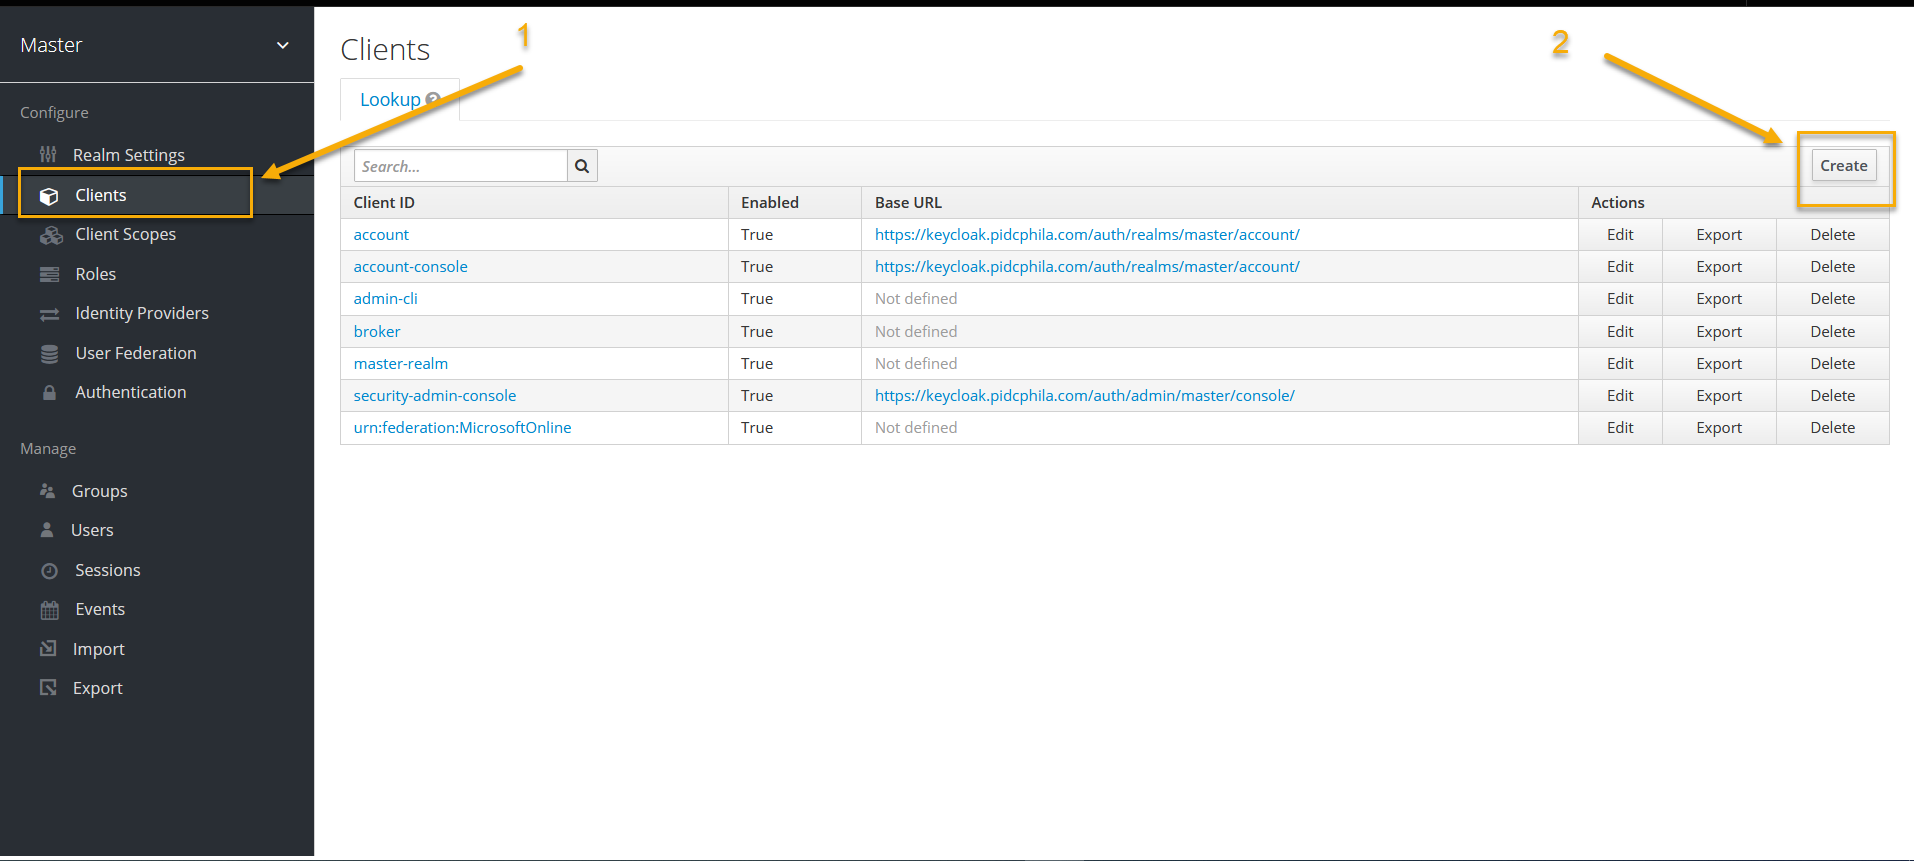
2. In the Keycloak admin console, go to your realm → the Clients tab. Click Create.
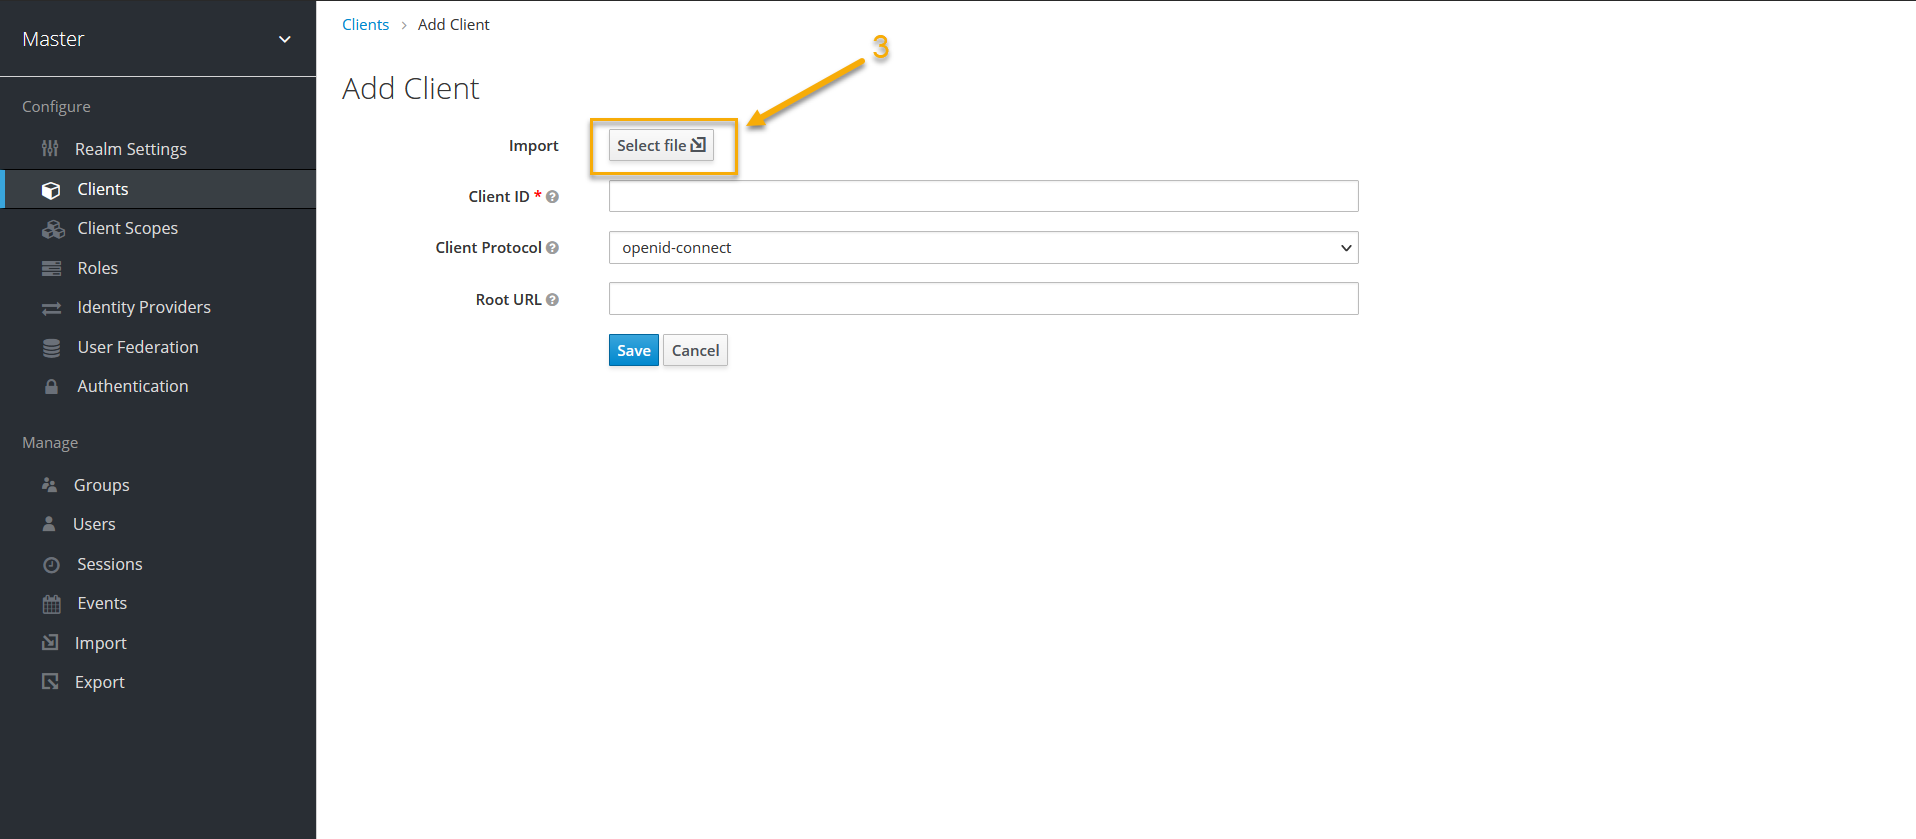
3. On the Add client tab, do the following:
- Import Azure AD metadata file downloaded earlier.
- Fill in the client information fields, and then click Save.
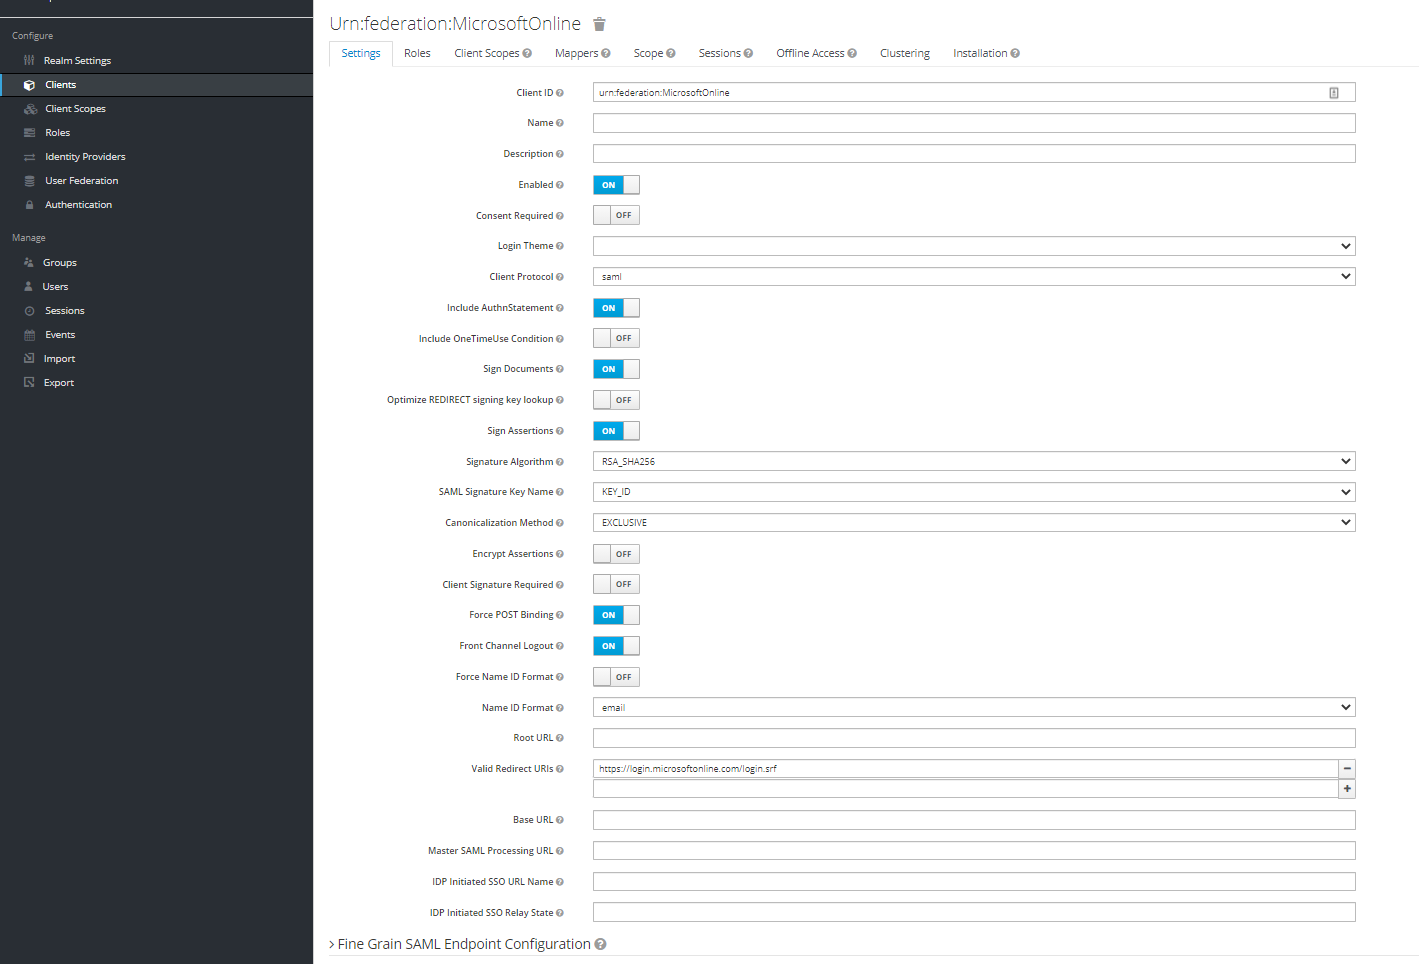
4. On the Settings tab, set the parameters as shown on the image below:
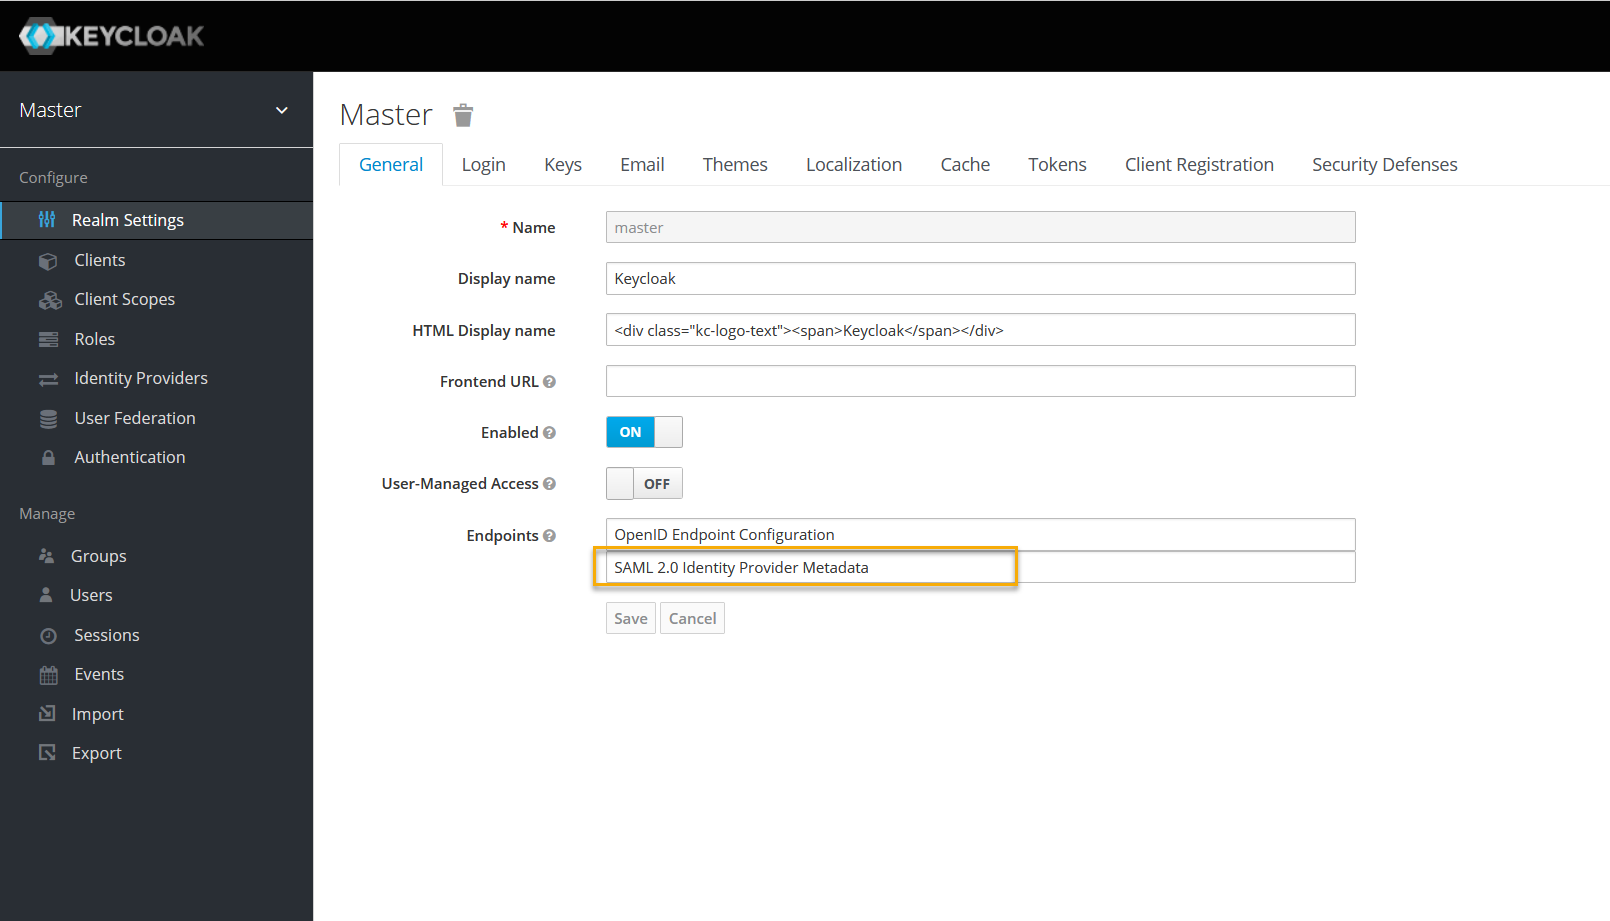
STEP 3. COPY THE IDP METADATA FROM KEYCLOAK
1. Log in to your Identité® Keycloak.
2. In Realm Settings, on the General tab, select SAML 2.0 Identity Provider Metadata to download the SAML Metadata.
Your URL should look similar to the following:
https://<keycloaklocation>/auth/realms/<realm>/protocol/saml/descriptor
STEP 4. CONFIGURE AZURE
1. Establish a connection between your Azure domain and the Keycloak realm. Use the following PowerShell script:
$cert="<insert here a X509Certificate from Keycloak's SAML Metadata file>"
$dom = Read-Host 'What domain should be connected to Keycloak?'
$issuer="https://<your.domain.com>/auth/realms/master"
$ecpUrl="https://<your.domain.com>/auth/realms/master/protocol/saml"
$logoffuri="https://<your.domain.com>/auth/realms/master/protocol/saml"
$passivelogonuri="https://<your.domain.com>/auth/realms/master/protocol/saml"
$protocol="SAMLP"
Connect-MsolService
Set-MsolDomainAuthentication -DomainName $dom -FederationBrandName
$dom -Authentication Managed
#Set-MsolDomain -Name $dom2 -IsDefault
Set-MsolDomainAuthentication -DomainName
$dom -FederationBrandName
$dom -Authentication Federated -IssuerUri $issuer `
`-LogOffUri $logoffuri -PassiveLogOnUri $passivelogonuri -ActiveLogOnUri
$ecpUrl -SigningCertificate $cert -PreferredAuthenticationProtocol
$protocol
Get-MsolDomain
Get-MSolDomainFederationSettings -DomainName $dom | Format-List *
2. Enter the data that you have obtained at the previous step.
Connect-MsolService
$dom = Read-Host 'What domain should be disconnected from Keycloak?'
Set-MsolDomainAuthentication -DomainName $dom -FederationBrandName $dom -Authentication Managed
3. Keycloack is connected to the AD via LDAP protocol, and since Azure AD does not support LDAP directly, your Azure AD needs to be synced with your on-premise AD with via Azure AD Connect. To do this, see Microsoft Documentation.
4. After the synchronization is completed, your login requests for the chosen domain will be processed by Keycloak.
For instructions on how to add NoPass™ Login, see Set up the NoPass™ extension.
next topic: GitLab
previous topic: Google