Additional APIs for SaaS
how to Create a service
Prerequisites
To add the first Service, you shall have to make your first API request. Before this, make sure that your Service portal has all necessary APIs integrated into it. The APIs to be integrated into the backend of your portal and the methods to be used are described here: NoPass™ API Integration. During APIs integration, you set up the Admin Login (AdminID) and the secret key (S-code) which will be used later in Service creation.
While you integrate the APIs into your Service portal on the backend, the Service itself is created through the Admin Console.
Procedure
1. Sign in to the Admin Console. For more details, go to Sign in to Admin Console.
2. In your Admin Console, navigate to Services.
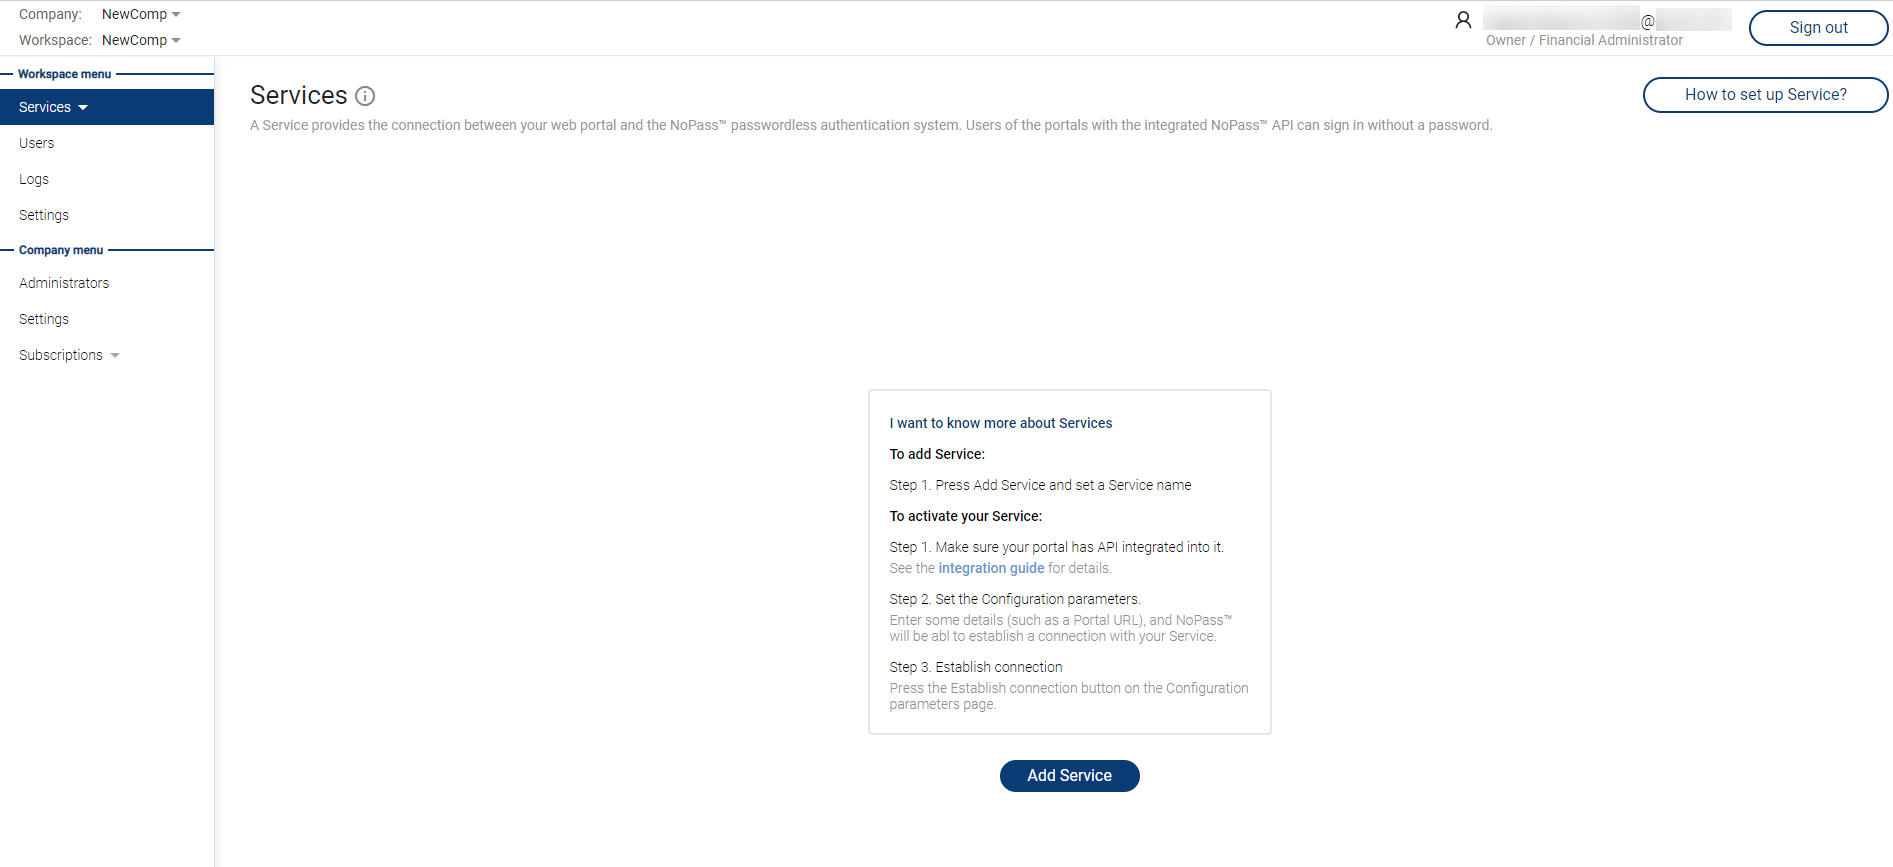
2. Click Add service. The following window shall be displayed:
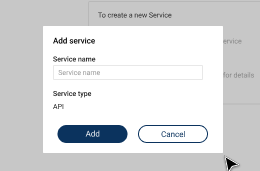
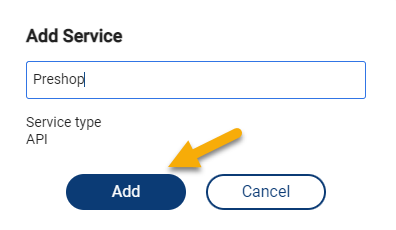
3. Let's use one of the NoPass™ demo portals - www.preshop.idenite.us - to create the service. Fill in the Service name box with the name of the portal: Preshop. Then click Add.
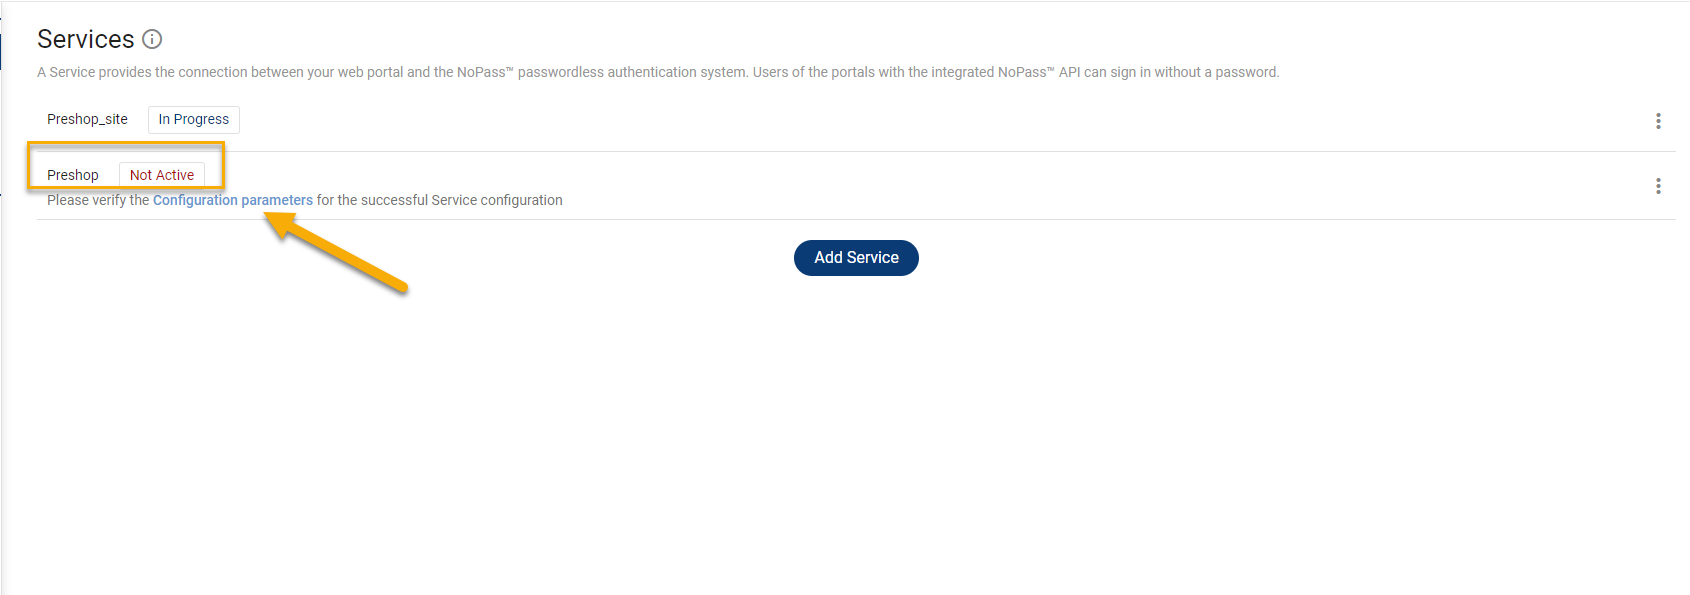
4. A new Service is displayed in your Services menu with the status Not Active.
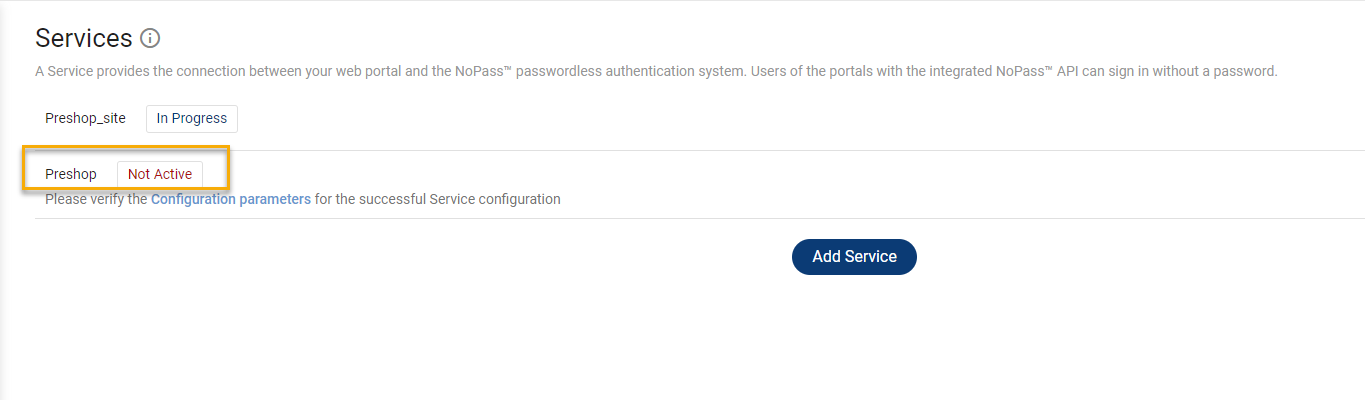
5. To make your Service active, you need to make your first API request. Click Configuration parameters.
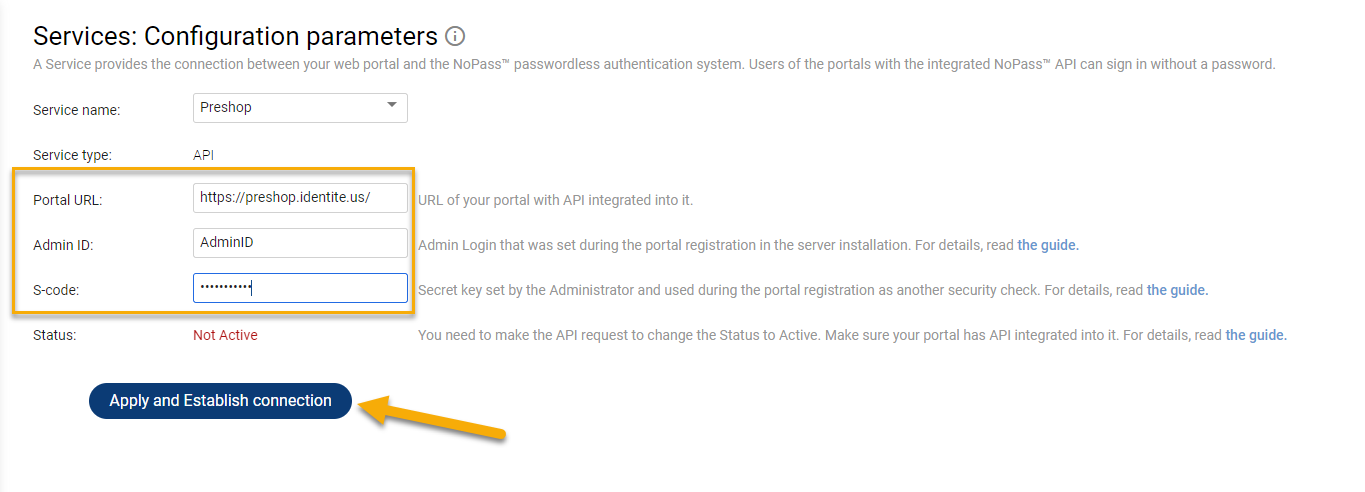
6. To make the API request, you will need 3 important things:
- the portal URL, which is available to you in the browser
- Admin login (Admin ID) with the length not more than 64 case-sensitive characters
- S-code (password) with the length not less than 8 characters including capital letters and numbers or symbol
Both Admin ID and S-code are set when integrating the NoPass™ APIs into your portal (see NoPass™ API Integration).
For example:
Portal URL: https://preshop.identite.us
AdminId: NopassAdmin
S-code: 0B43ACAF37AF4F8183B2DDD482837E91
Let's assume that for the Preshop portal, the Admin ID and S-code values are available in the Settings of the Preshop database.
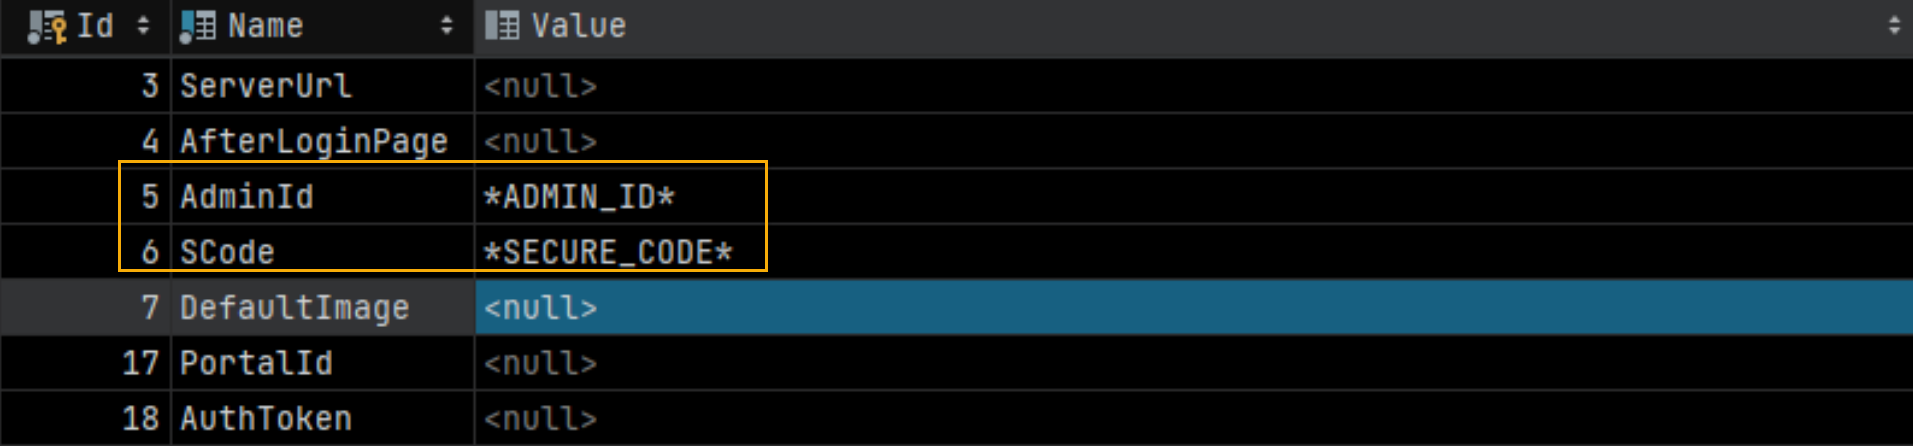
7. Fill in the boxes with the values and click Apply and establish connection.
8. NoPass™ server sends a request to the user portal API “~/api/PortalCommunication/ConfirmPreRegistration”
Example:
https://your.portal.com/api/PortalCommunication/ConfirmPreRegistration
It is used to verify whether the admin login (AdminID) is correct.
9. This request is processed in the "PortalCommunicationController.cs” file, the “ConfirmPreRegistration” method (see 1. CONFIRM PORTAL PREREGISTRATION section in the NoPass™ API Integration ). The necessary checks are made and the output is generated in this place.
10. When establishing the connection with the server, the Service you created changes its status from Not Active to In Progress.
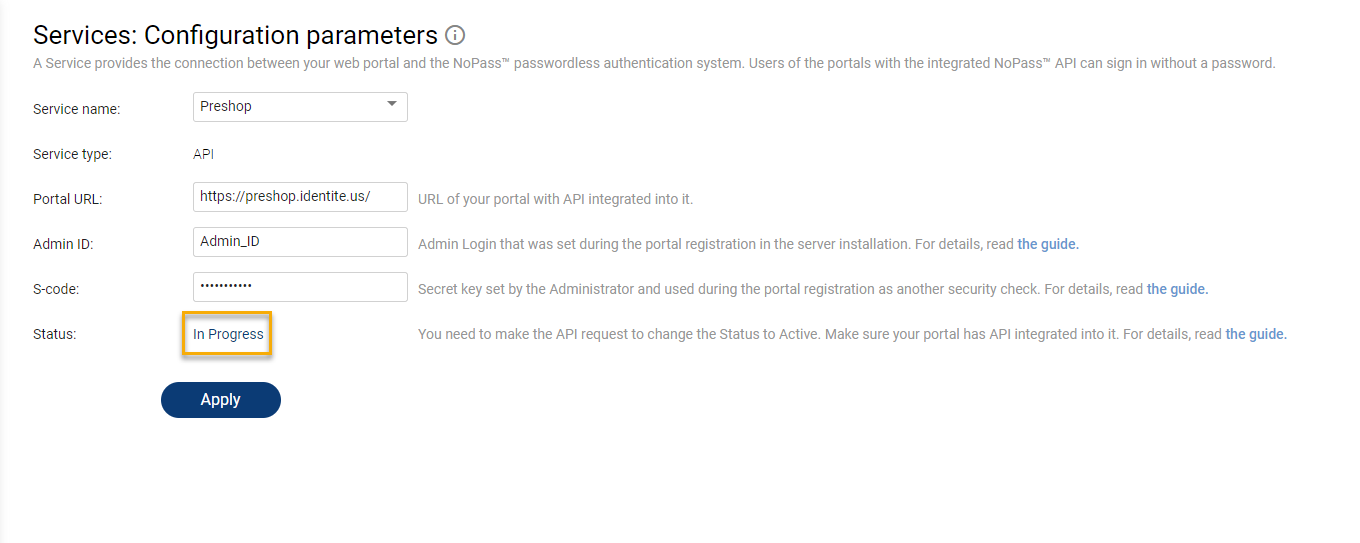
Web URL is the URL of your portal with API integrated into it.
Admin ID is the adminId (Admin Login) set during the server installation's portal registration.
S-code is the sCode used by the NoPass™ system to validate the service. It is a secret key set by the administrator and used during portal registration as another security check.
More information on the S-code and Admin ID can be found at NoPass API integration.
11. Also, the NoPass™ server sends a request to the user portal API “~/api/PortalCommunication/ConfirmRegistration”
Example:
https://your.portal.com/api/PortalCommunication/ConfirmRegistration
This method is called after the administrator has finished registering for NoPass™.
12. This request is processed in the “PortalCommunicationController.cs” file, “ConfirmRegistration” method (see 2. CONFIRM PORTAL REGISTRATION section in the NoPass™ API Integration ). Registration information of the portal is saved here and will be used next time in requests or checking of responses data.
13. After the Preregistration and Registration requests are successfully fulfilled, the Service changes its status to Active. Now your Service is added to your Workspace.
next topic: Overview: NoPass™ SDK
previous topic: Additional APIs for PaaS