How to configure the RADIUS portal
To configure the RADIUS portal, do the following:
- Log in to the RADIUS Admin console using the following link:
https://SERVER_URL/#/<PortalName>/admin/login
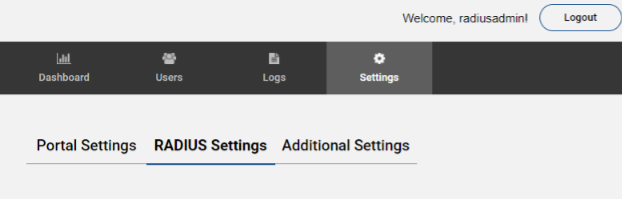
- On the RADIUS Admin console, select RADIUS settings.
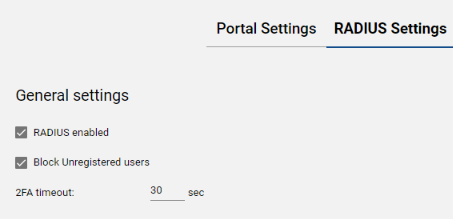
- In the General settings group, configure the following parameters:
- Select RADIUS enabled.
- Set 2FA timeout—confirmation timeout on a mobile device—less than the service connection timeout.
- Select Block Unverified users to block connection for unverified users.
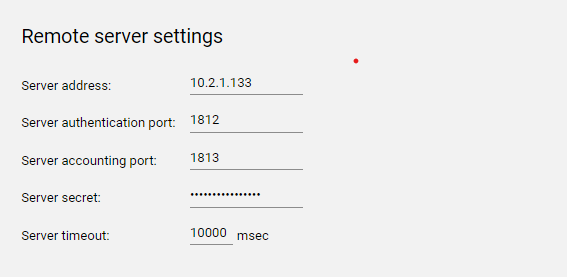
- In the Remote server settings group, configure the following parameters:
- Fill in the Server address field.
- Fill in the Server authentication port field.
- Fill in the Server accounting port field.
- In the Server secret field, enter the RADIUS server secret.
- Set the Server timeout for connection timeout to the RADIUS server.
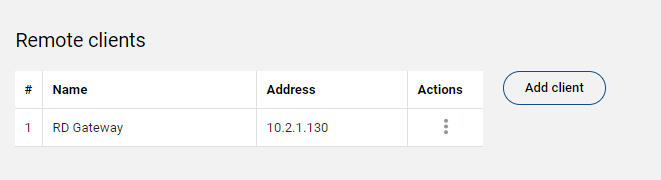
- In the Remote clients group, configure the following parameters:
- Name—service display name.
- Address—service address.
- Secret—service secret.
- Link—link to the server user manual.
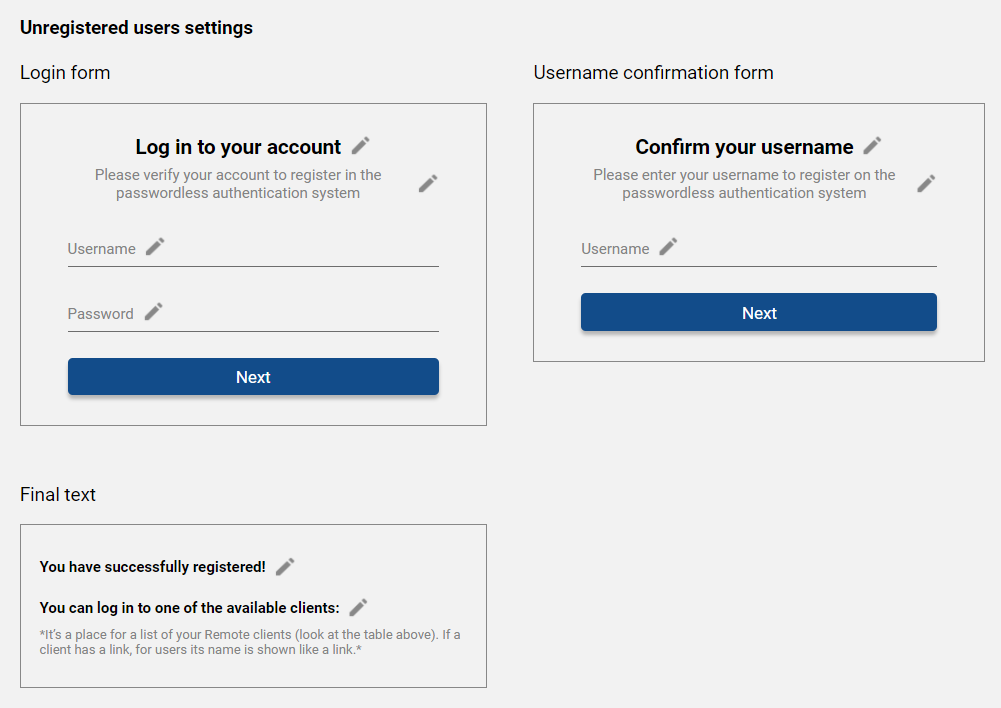
- To customize the design of the RADIUS login page, configure the following parameters on the Additional Settings subtab:
- Click
 Edit to change the default text entries.
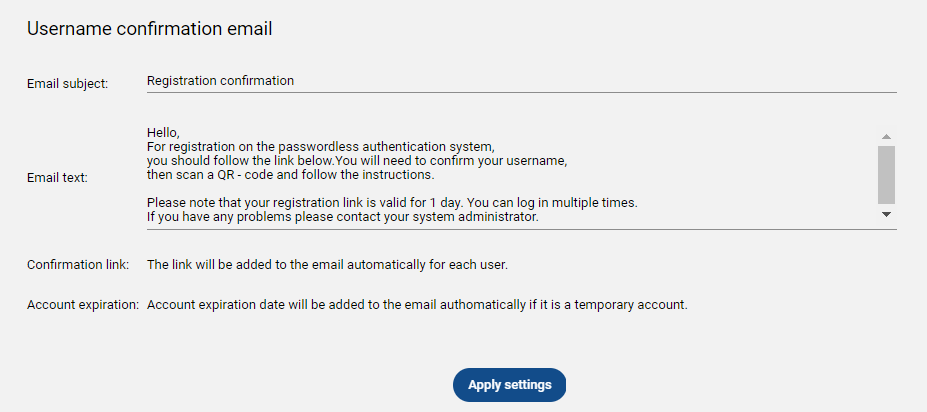
- In the Username confirmation email group, set Email subject, Email text, Confirmation link, and Account expiration values.
- Click
- Click Apply settings for the changes to take effect.